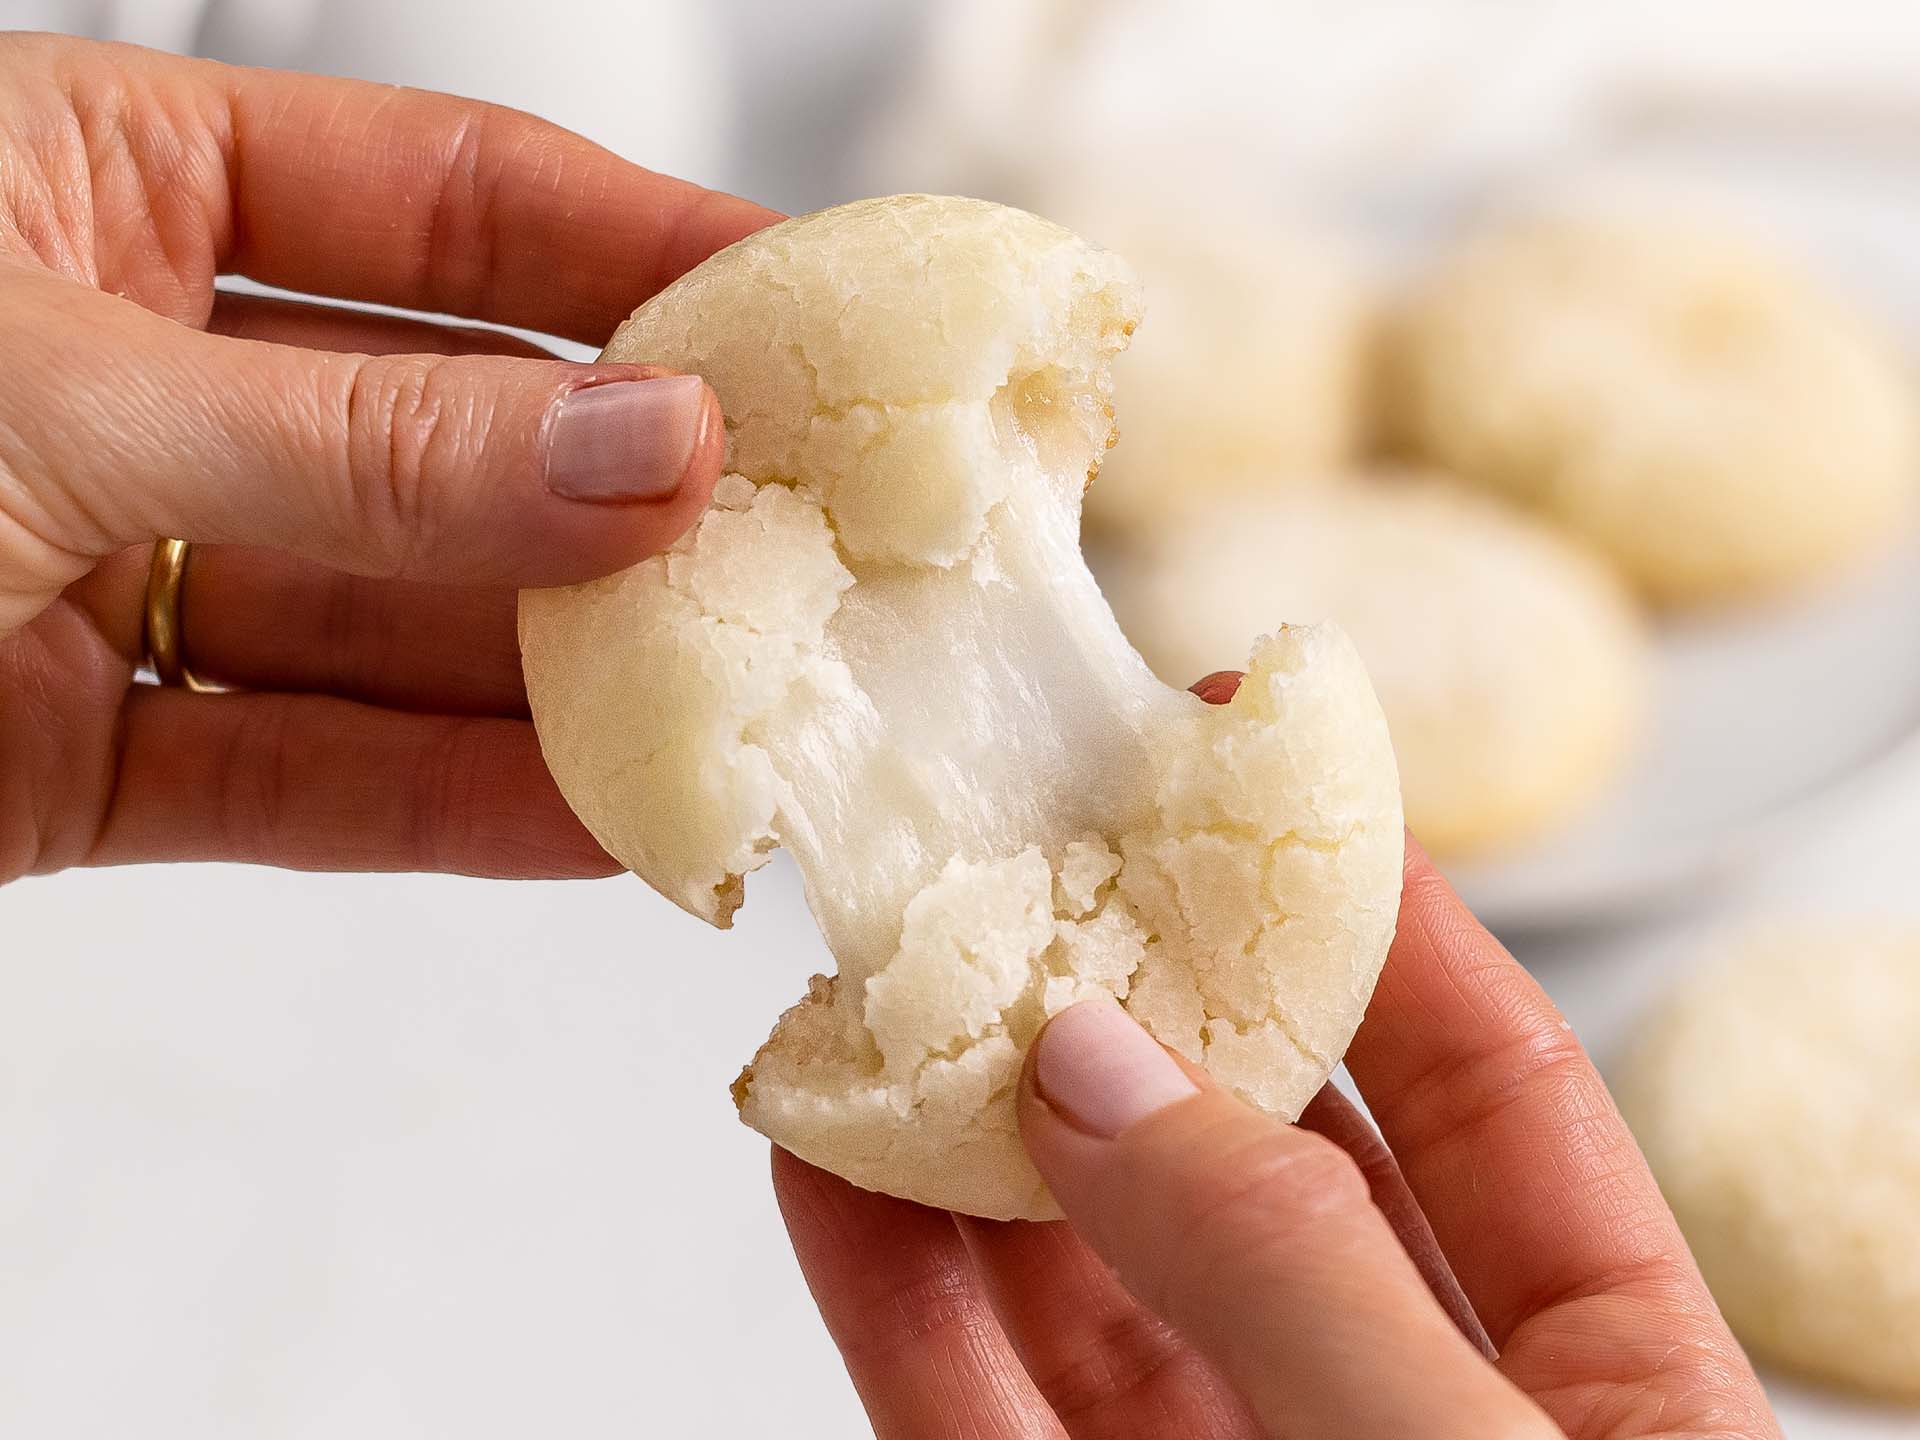
Today, we'll show how to use Japanese mochiko flour to make these irresistible mochi cookies. They're crumbly outside and incredibly soft and chewy inside — a must-try for all mochi lovers!
And the good news is they're both vegan and gluten-free (and optionally sugar-free), as we made them with just Japanese rice flour and a few other plant-based ingredients.
These mochi cookies consist of a crispy cookie dough shell and a soft mochi filling. Both the doughs are made with Japanese glutinous rice flour, aka mochigomeko, or mochiko for short.
You can find glutinous rice flour at your local Asian food store or online. It looks like regular rice flour, but it behaves completely differently.
When you cook mochiko flour, it turns soft, sticky, and gluey. That's because it's made from a special type of Japanese sticky rice, called mochigome. Glutinous rice flour is what makes the famous Japanese mochi balls so deliciously chewy.
To make the cookie dough, combine glutinous rice flour with sugar, coconut oil, and a little starch. Then, shape it into discs and use them to wrap the soft mochi filling.
As for the mochi filling, simply prepare the classic mochi dough you would use for Japanese mochi balls by cooking glutinous rice flour with icing sugar and water.
And if you like, you can flavour it with cacao powder or green tea powder as we did in these matcha mochi cookies.
Oh, and feel free to replace sugar with erythritol throughout the recipe to make these mochi cookies sugar-free.
Once you have stuffed the mochi cookie wrappers with the soft mochi dough, seal the cookies and bake them until golden. Then, get ready to savour the most delicious rice cookies you've ever had!
We guarantee you'll love them. The outer cookie shell turns wonderfully crumbly, while the mochi filling will stay soft and gooey. A real delight!
These Japanese mochi cookies are at their best when still warm, so we recommend warming them up before serving them if they get cold. But they are also delicious at room temperature. Try it both ways and see which one you prefer!
And if you'd like to discover more delicious recipes with mochi flour, check out these colourful ube mochi waffles or ube butter mochi balls. So good!
Ingredients
| Mochi Cookie Dough | |
| Glutinous Rice Flour (mochiko) | 120 g |
| Baking Powder | 1/2 tsp |
| Starch (corn, potato, or arrowroot) | 30 g |
| Sugar (or sugar-free erythritol) | 90 g |
| Coconut Oil (softened at room temperature) | 60 g |
| Coconut Milk Drink (or oat, soy, or almond milk) | 100 mL |
| Mochi Filling | |
| Glutinous Rice Flour (mochiko) | 85 g |
| Icing Sugar (or sugar-free erythritol) | 30 g |
| Water | 120 mL |
| To Garnish (optional) | |
| Maple Syrup (or honey) | to taste |
| Desiccated Coconut | to taste |
Step 1
Let's start by making the crunchy mochi cookie dough, which we'll use to wrap the soft mochi filling.
First, make sure you use Japanese glutinous rice flour (aka mochiko), not regular rice flour, or the cookies will have a completely different feel and texture.
Mix mochiko flour with baking powder, sifted starch, and caster sugar in a bowl.
If you want to make the mochi cookie dough sugar-free, you can swap caster sugar with zero-calorie sweetener erythritol.
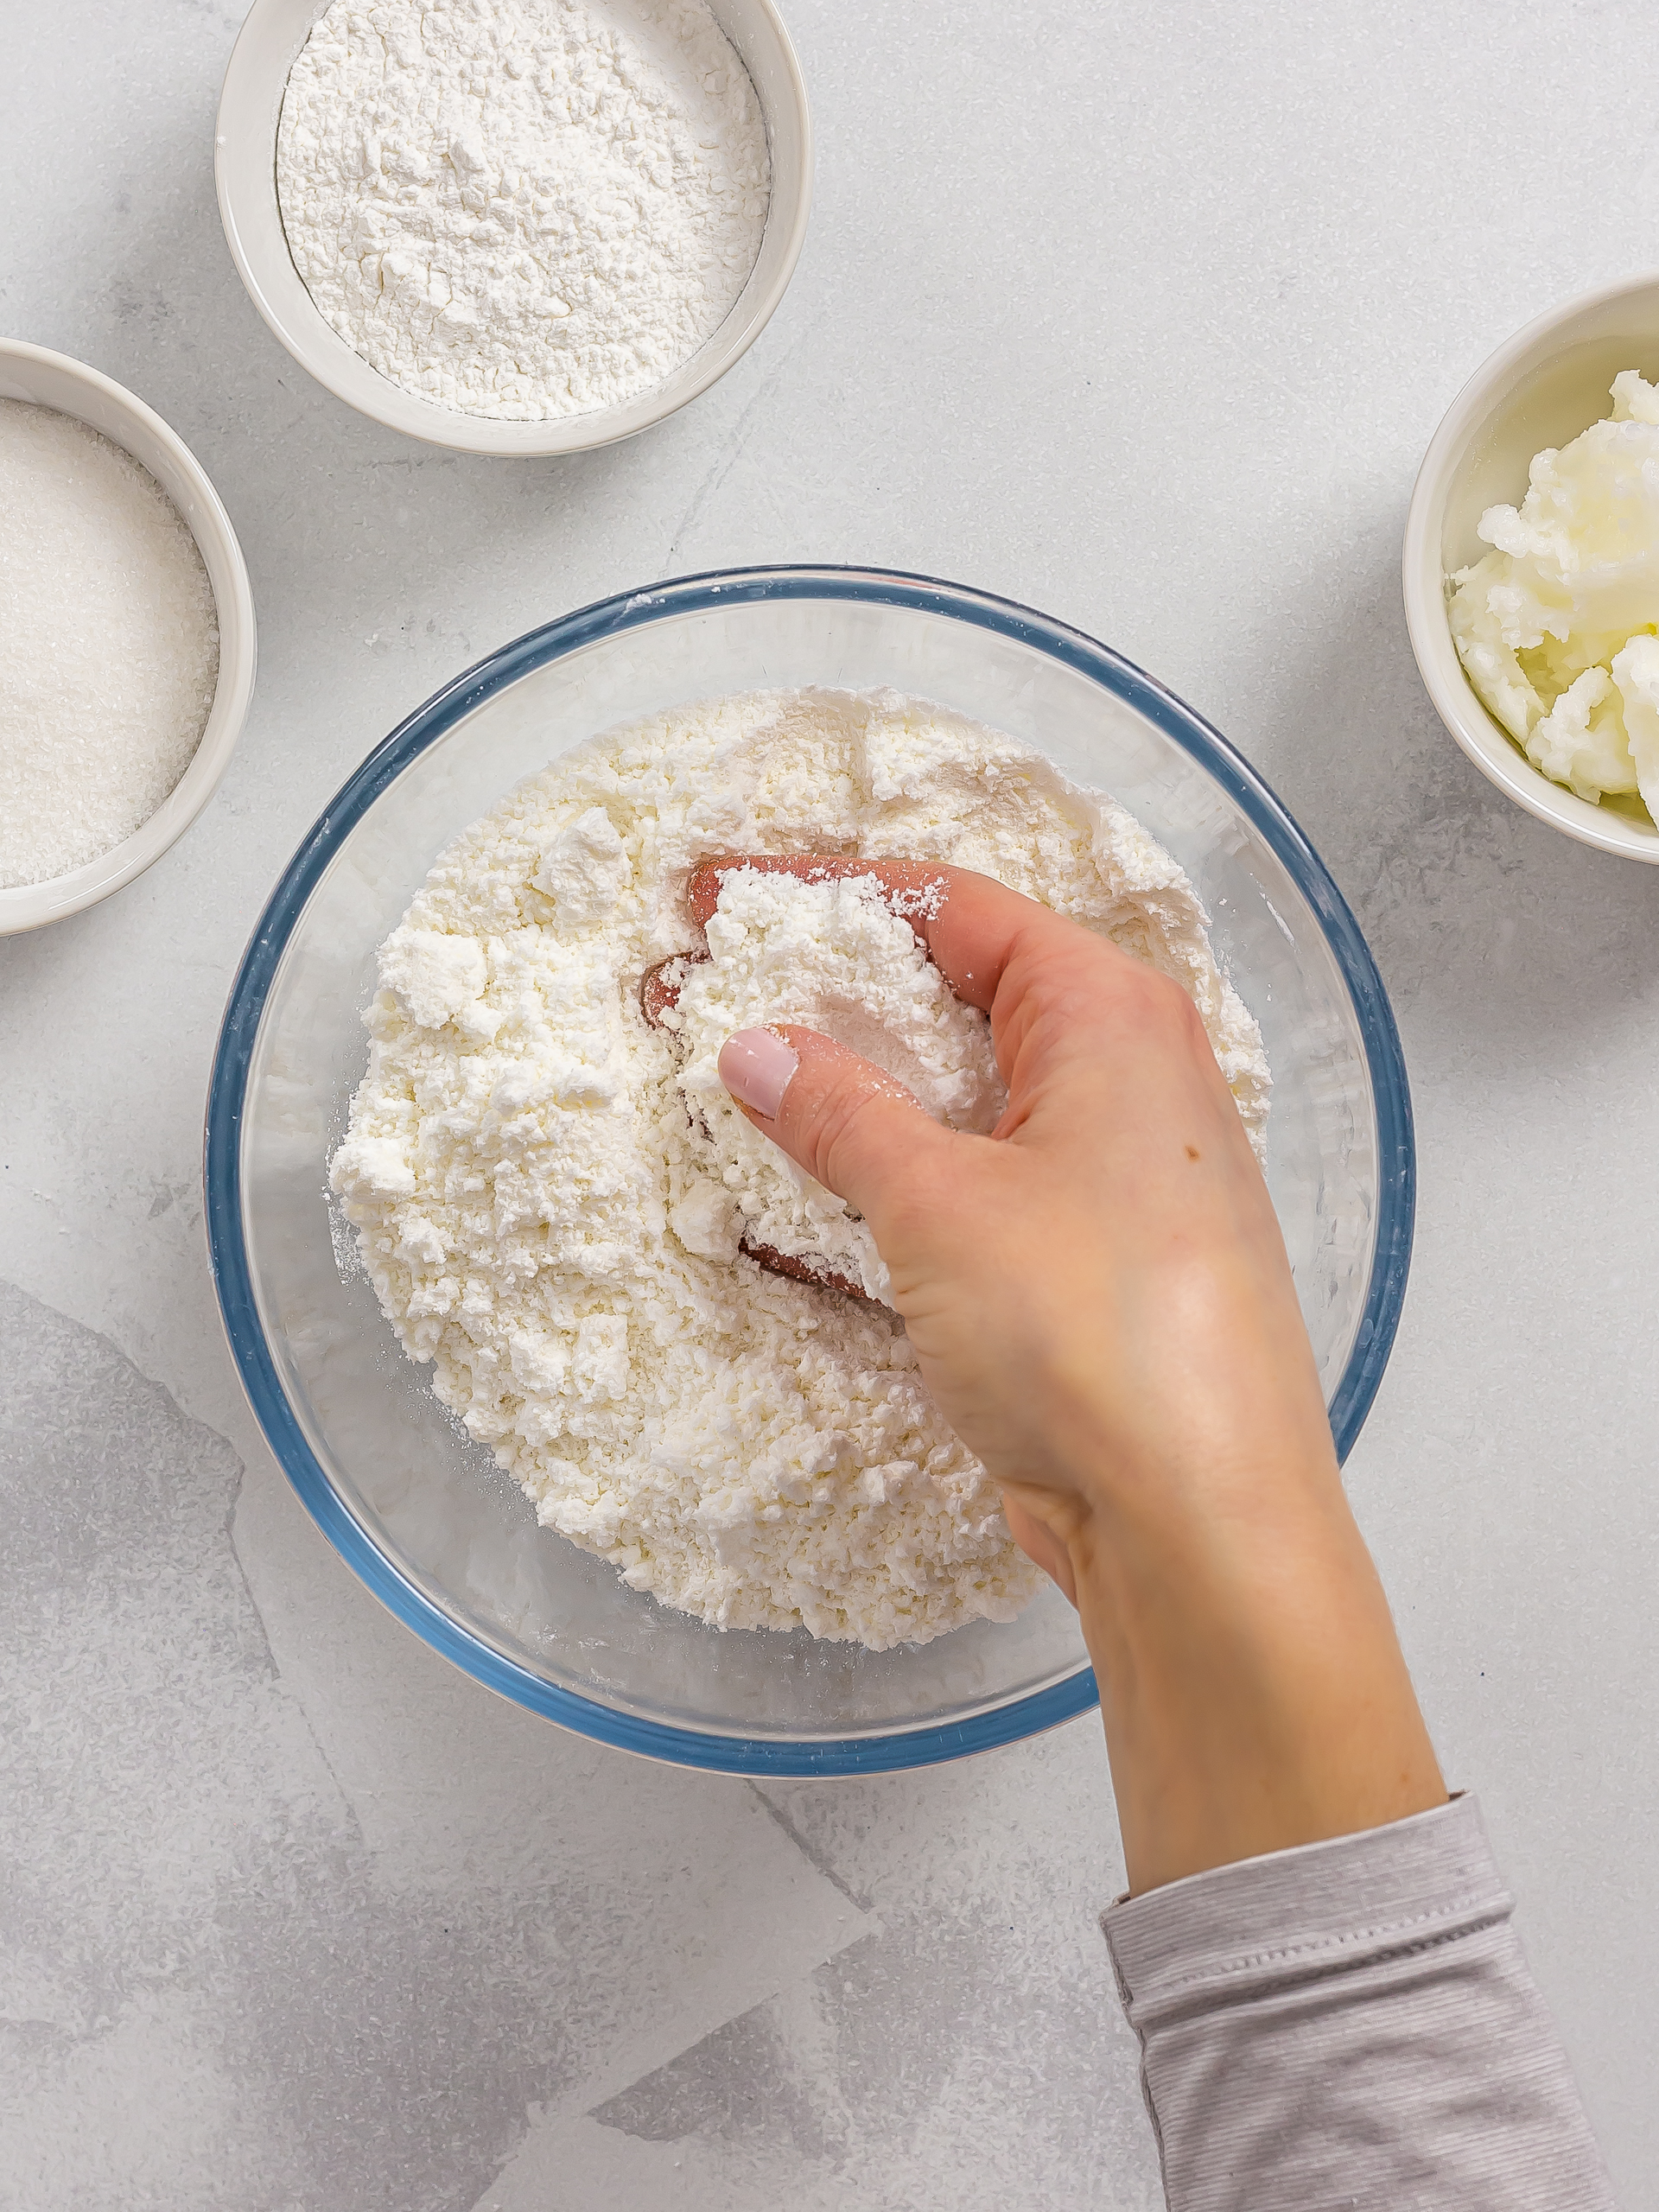
Next, add the coconut oil, softened at room temperature, and rub it with the flour using your fingertips until you have a crumbly, sandy mix.
Step 2
Now, tip in the plant-based milk and mix until the ingredients come together into a dough.
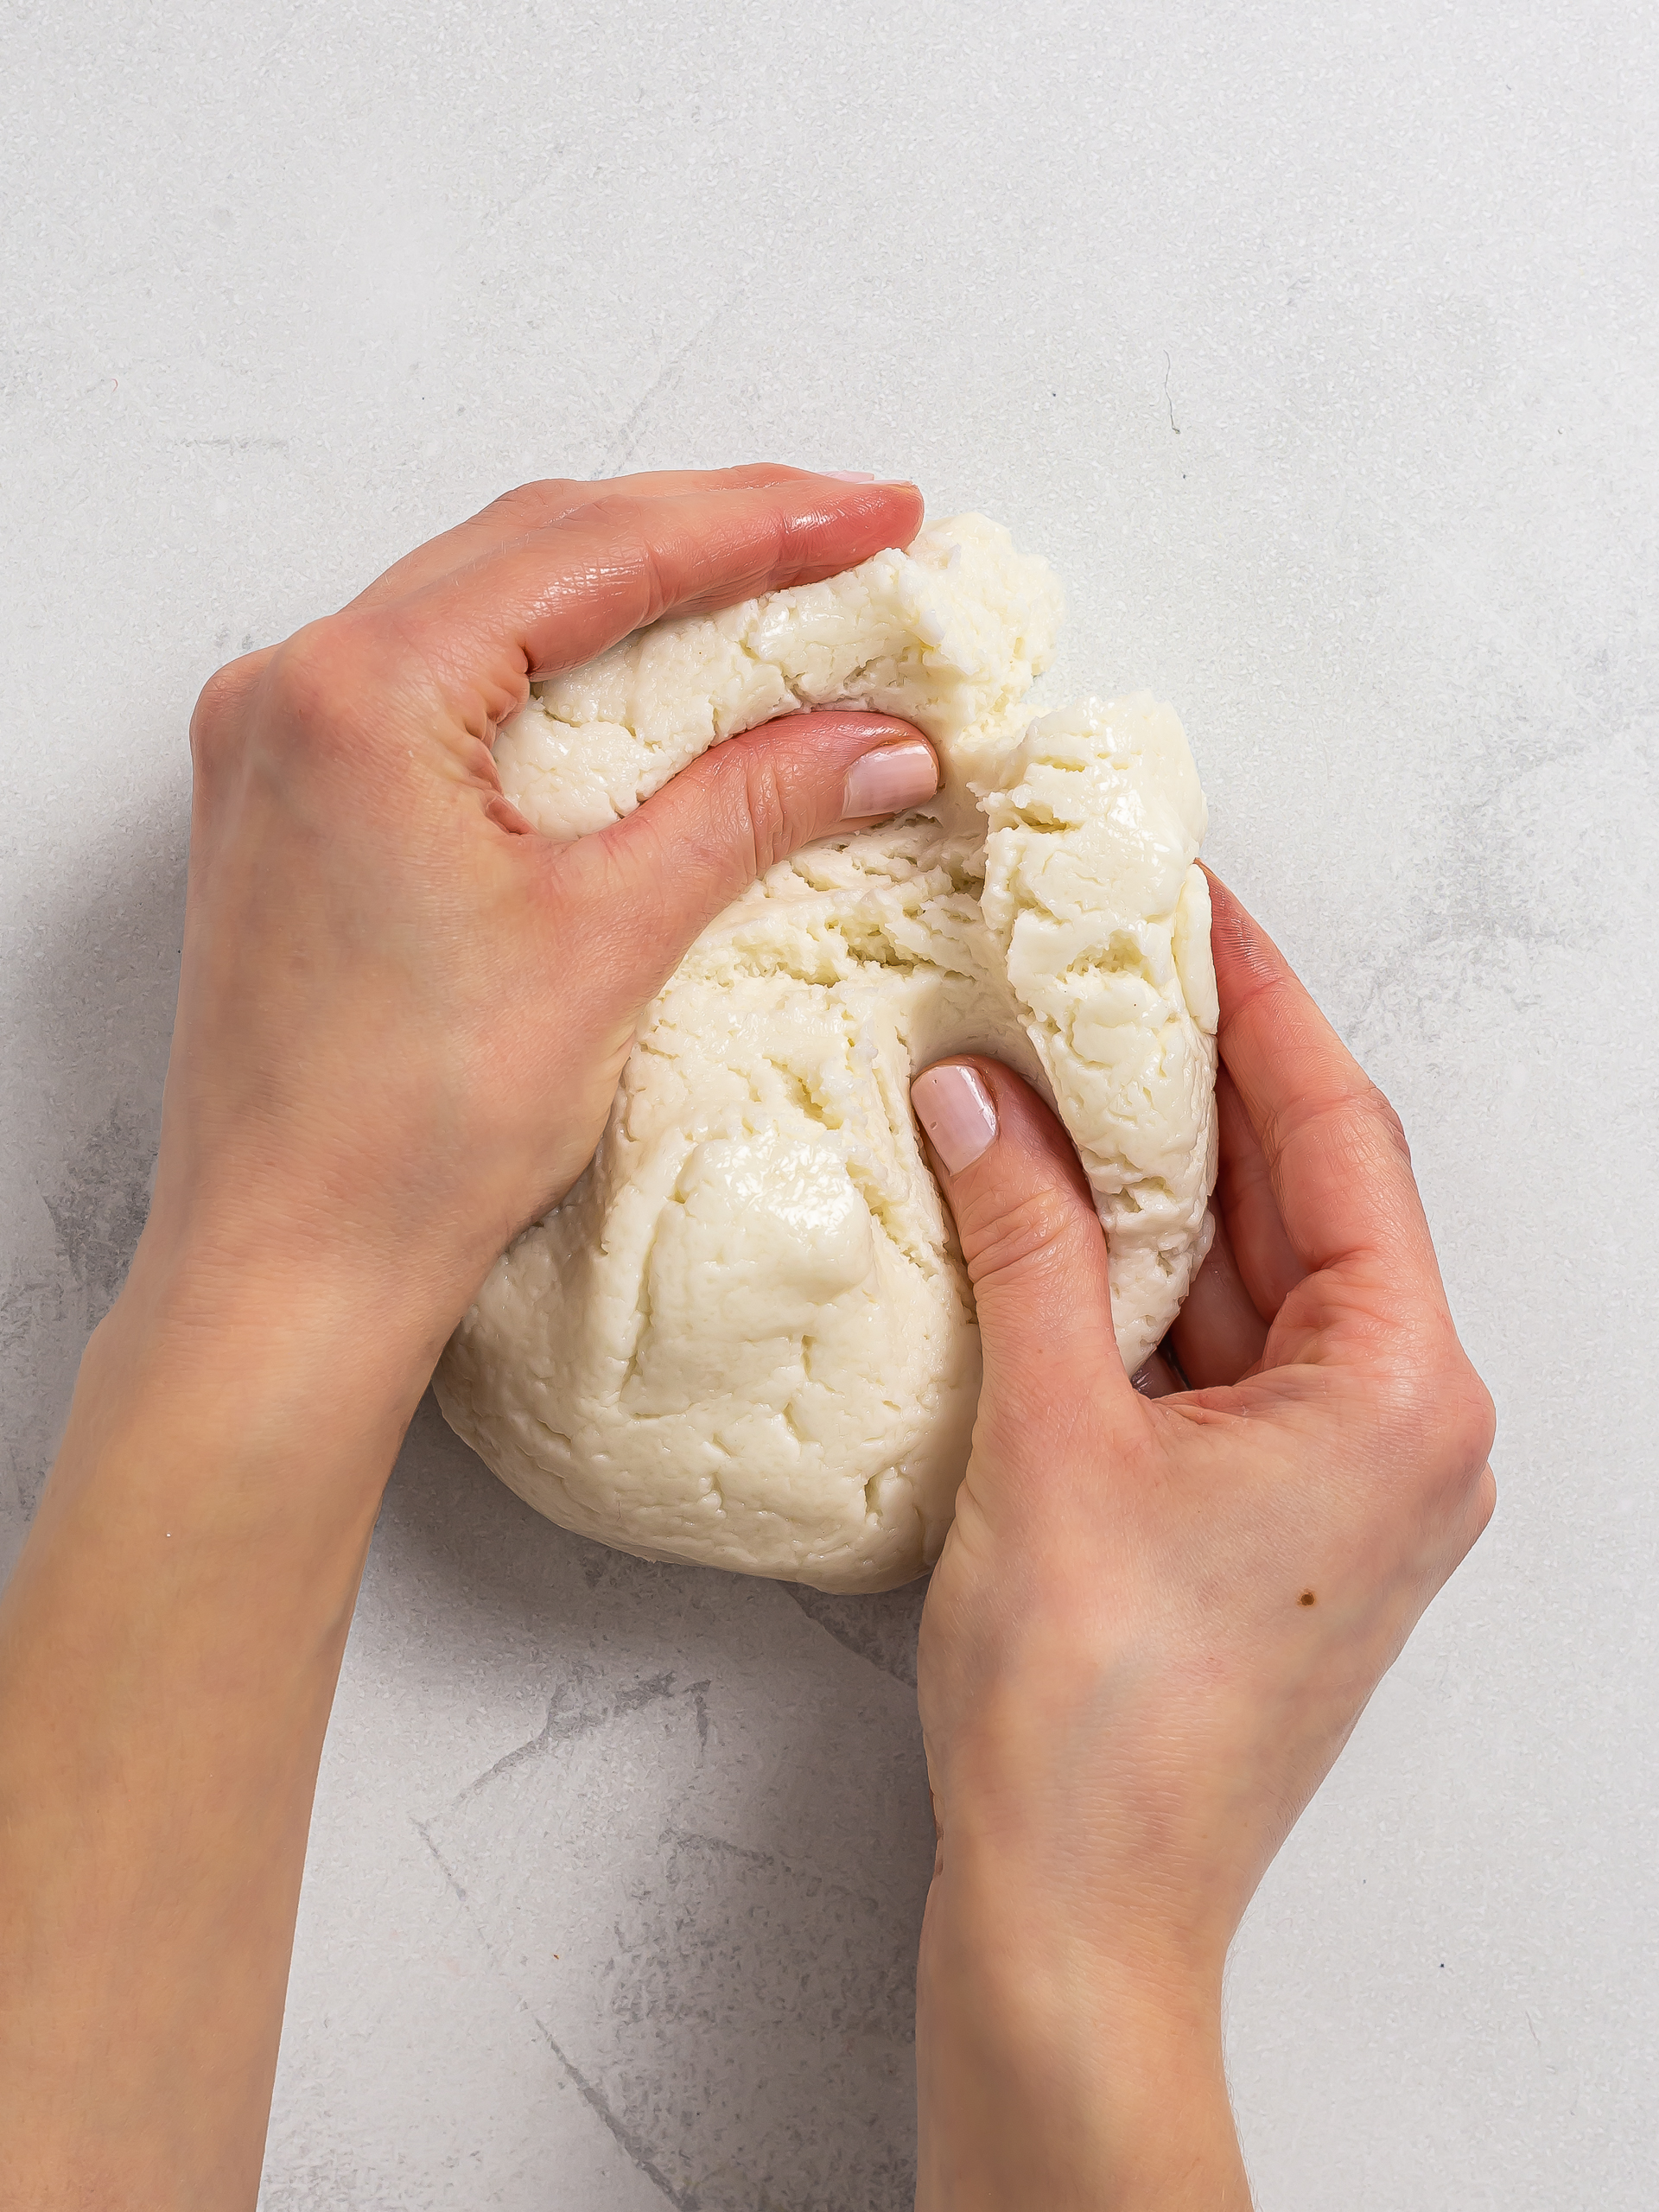
Then, knead the dough with your hands until it's smooth and uniform.
The dough should hold together when pinched, but it's okay if it crumbles a little bit when you knead it.
Roll it into a ball, wrap it in cling film and let it chill in the fridge while you prepare the soft mochi filling.
Step 3
For the mochi filling, mix glutinous rice flour with icing sugar in a pot.
Again, you can use erythritol instead of sugar (1:1 ratio) for a sugar-free option; just blitz it first in a food processor until it's pulverised and looks like icing sugar.
Now, stir in the water and mix well to dissolve any lumps.
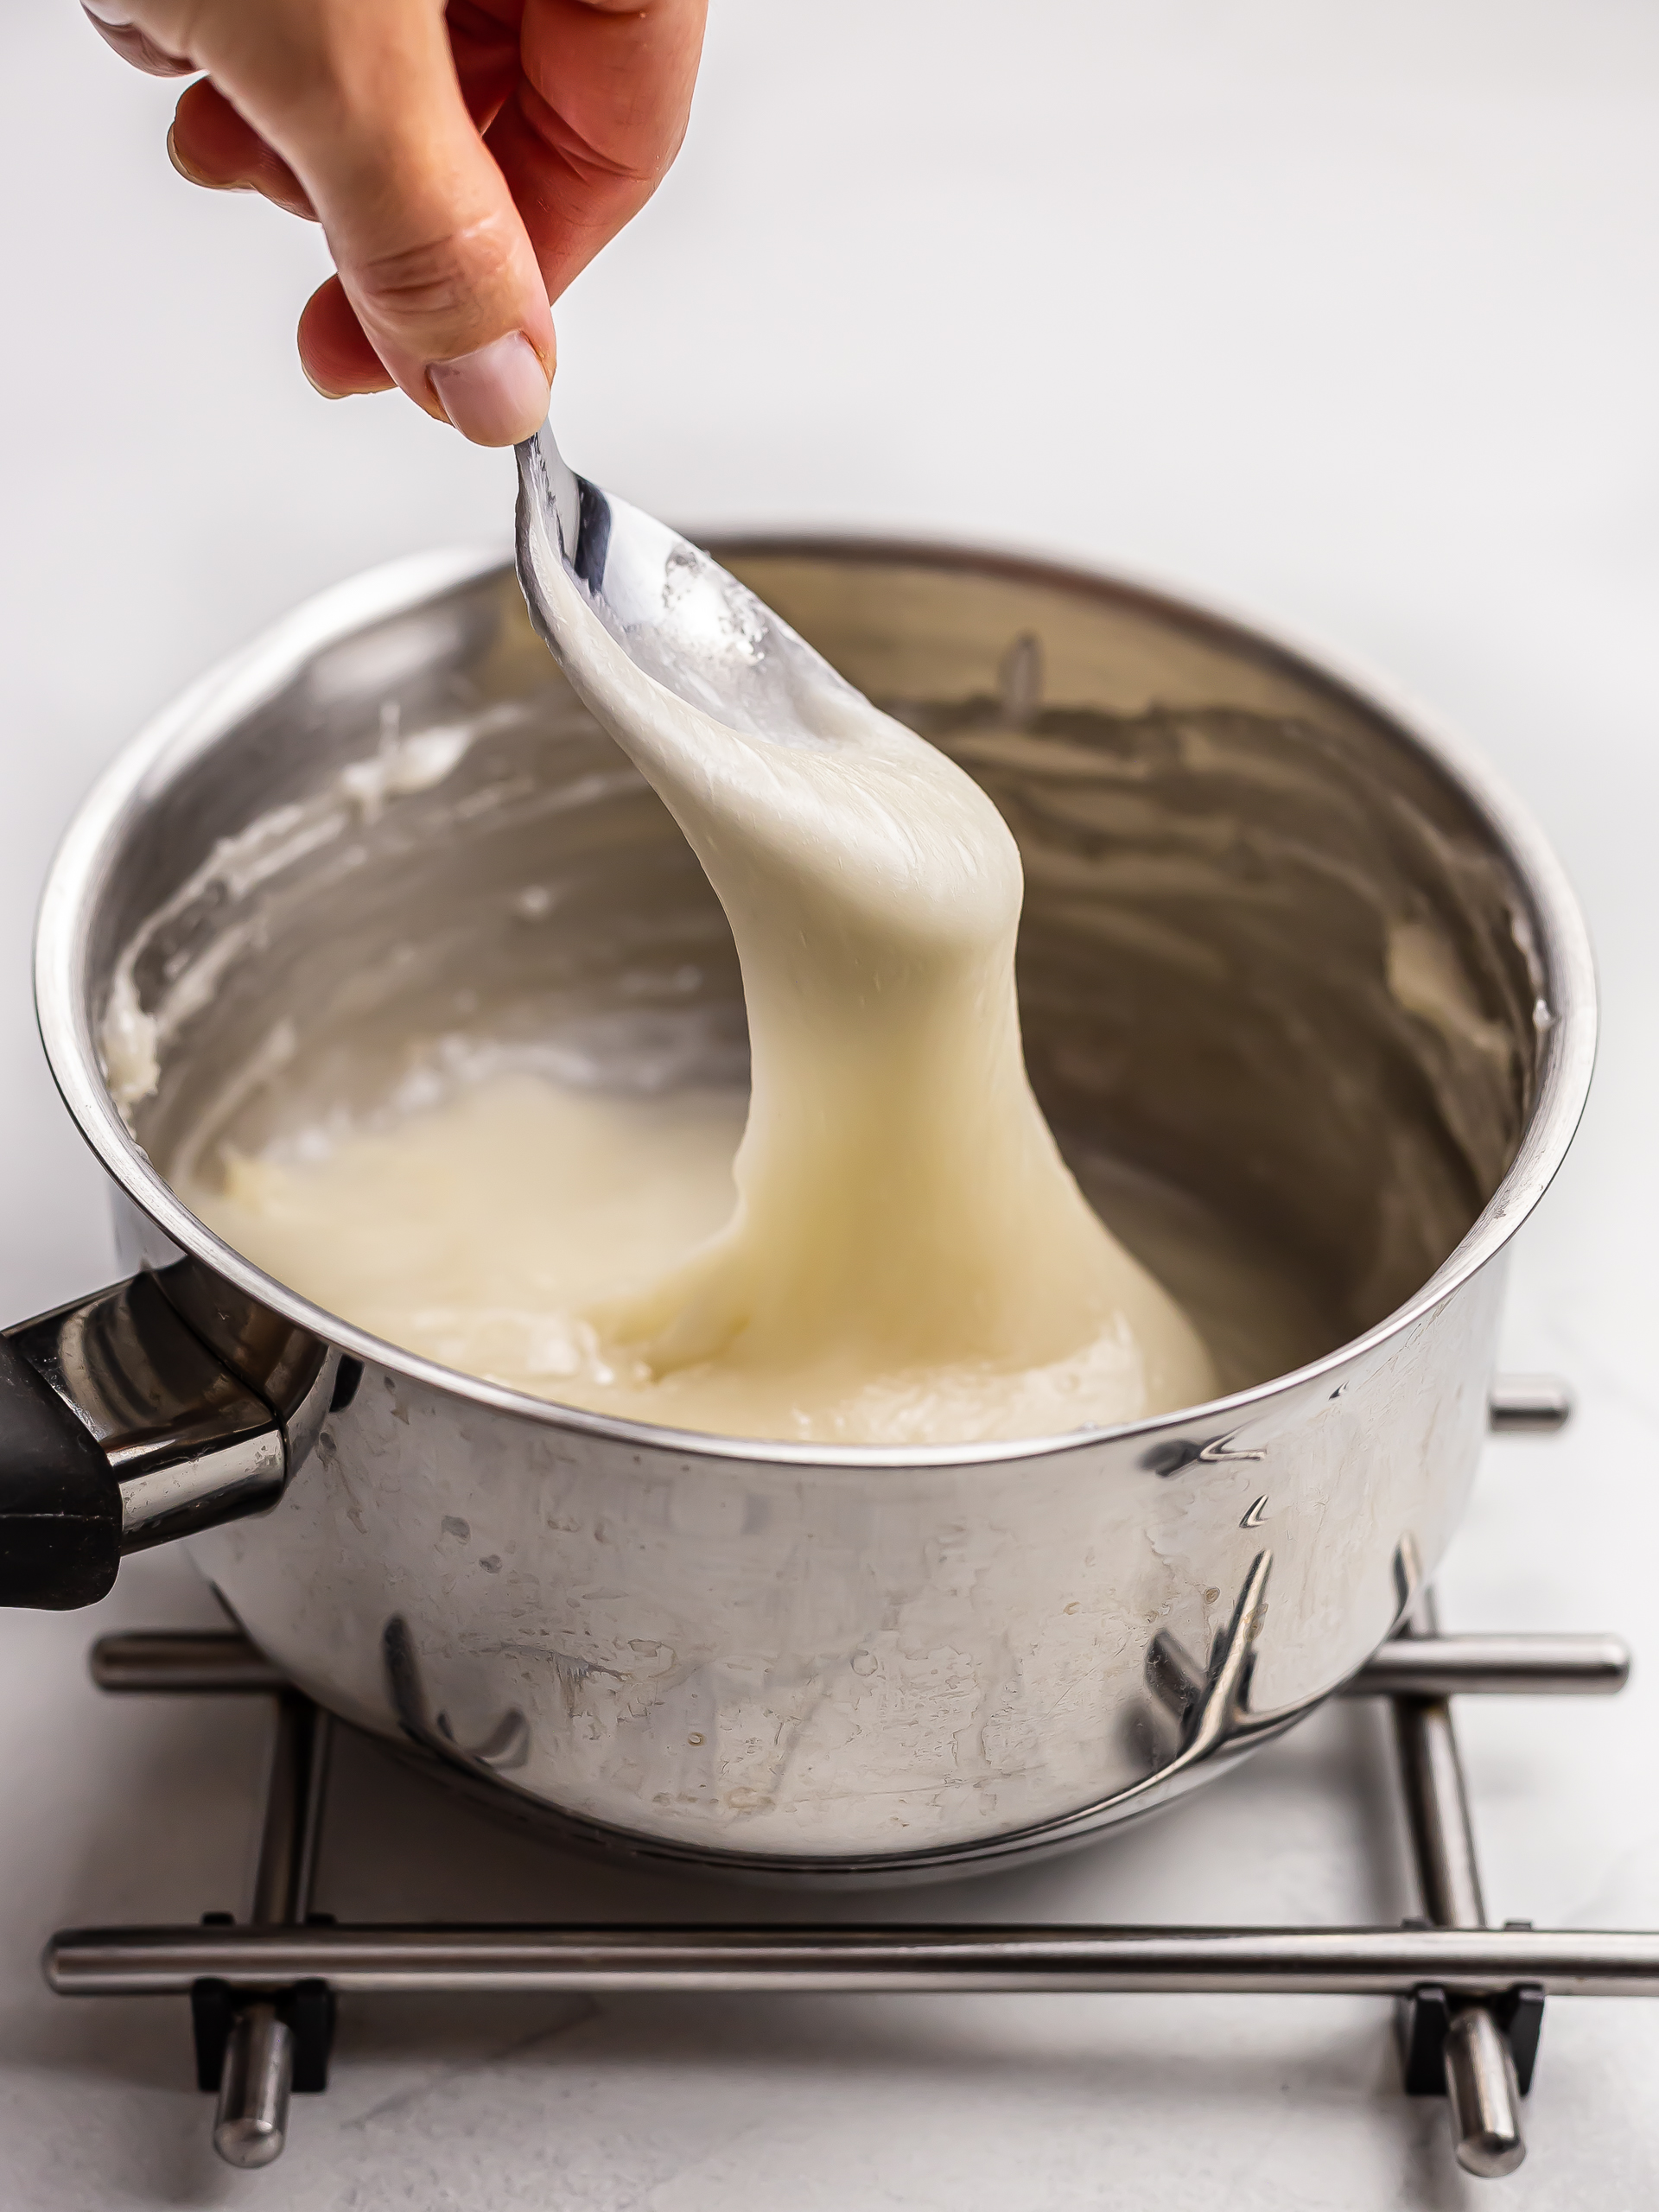
Heat the mochi flour mixture over low heat, stirring continuously with a spoon. As soon as it starts to thicken and form lumps, cook it for 5 more minutes while stirring.
You should now have a smooth, sticky, and stretchy mochi dough like in the picture.
If you need more help with this step, check out our ube mochi recipe where we go into more depth on how to make the mochi dough.
Dust your worktop or a sheet of baking paper with starch and transfer the hot mochi dough onto it with the help of a spoon.
Then, dust the dough with more starch; the starch will make the dough less sticky and easier to handle.
Step 4
Now, let's assemble our mochi-filled cookies.
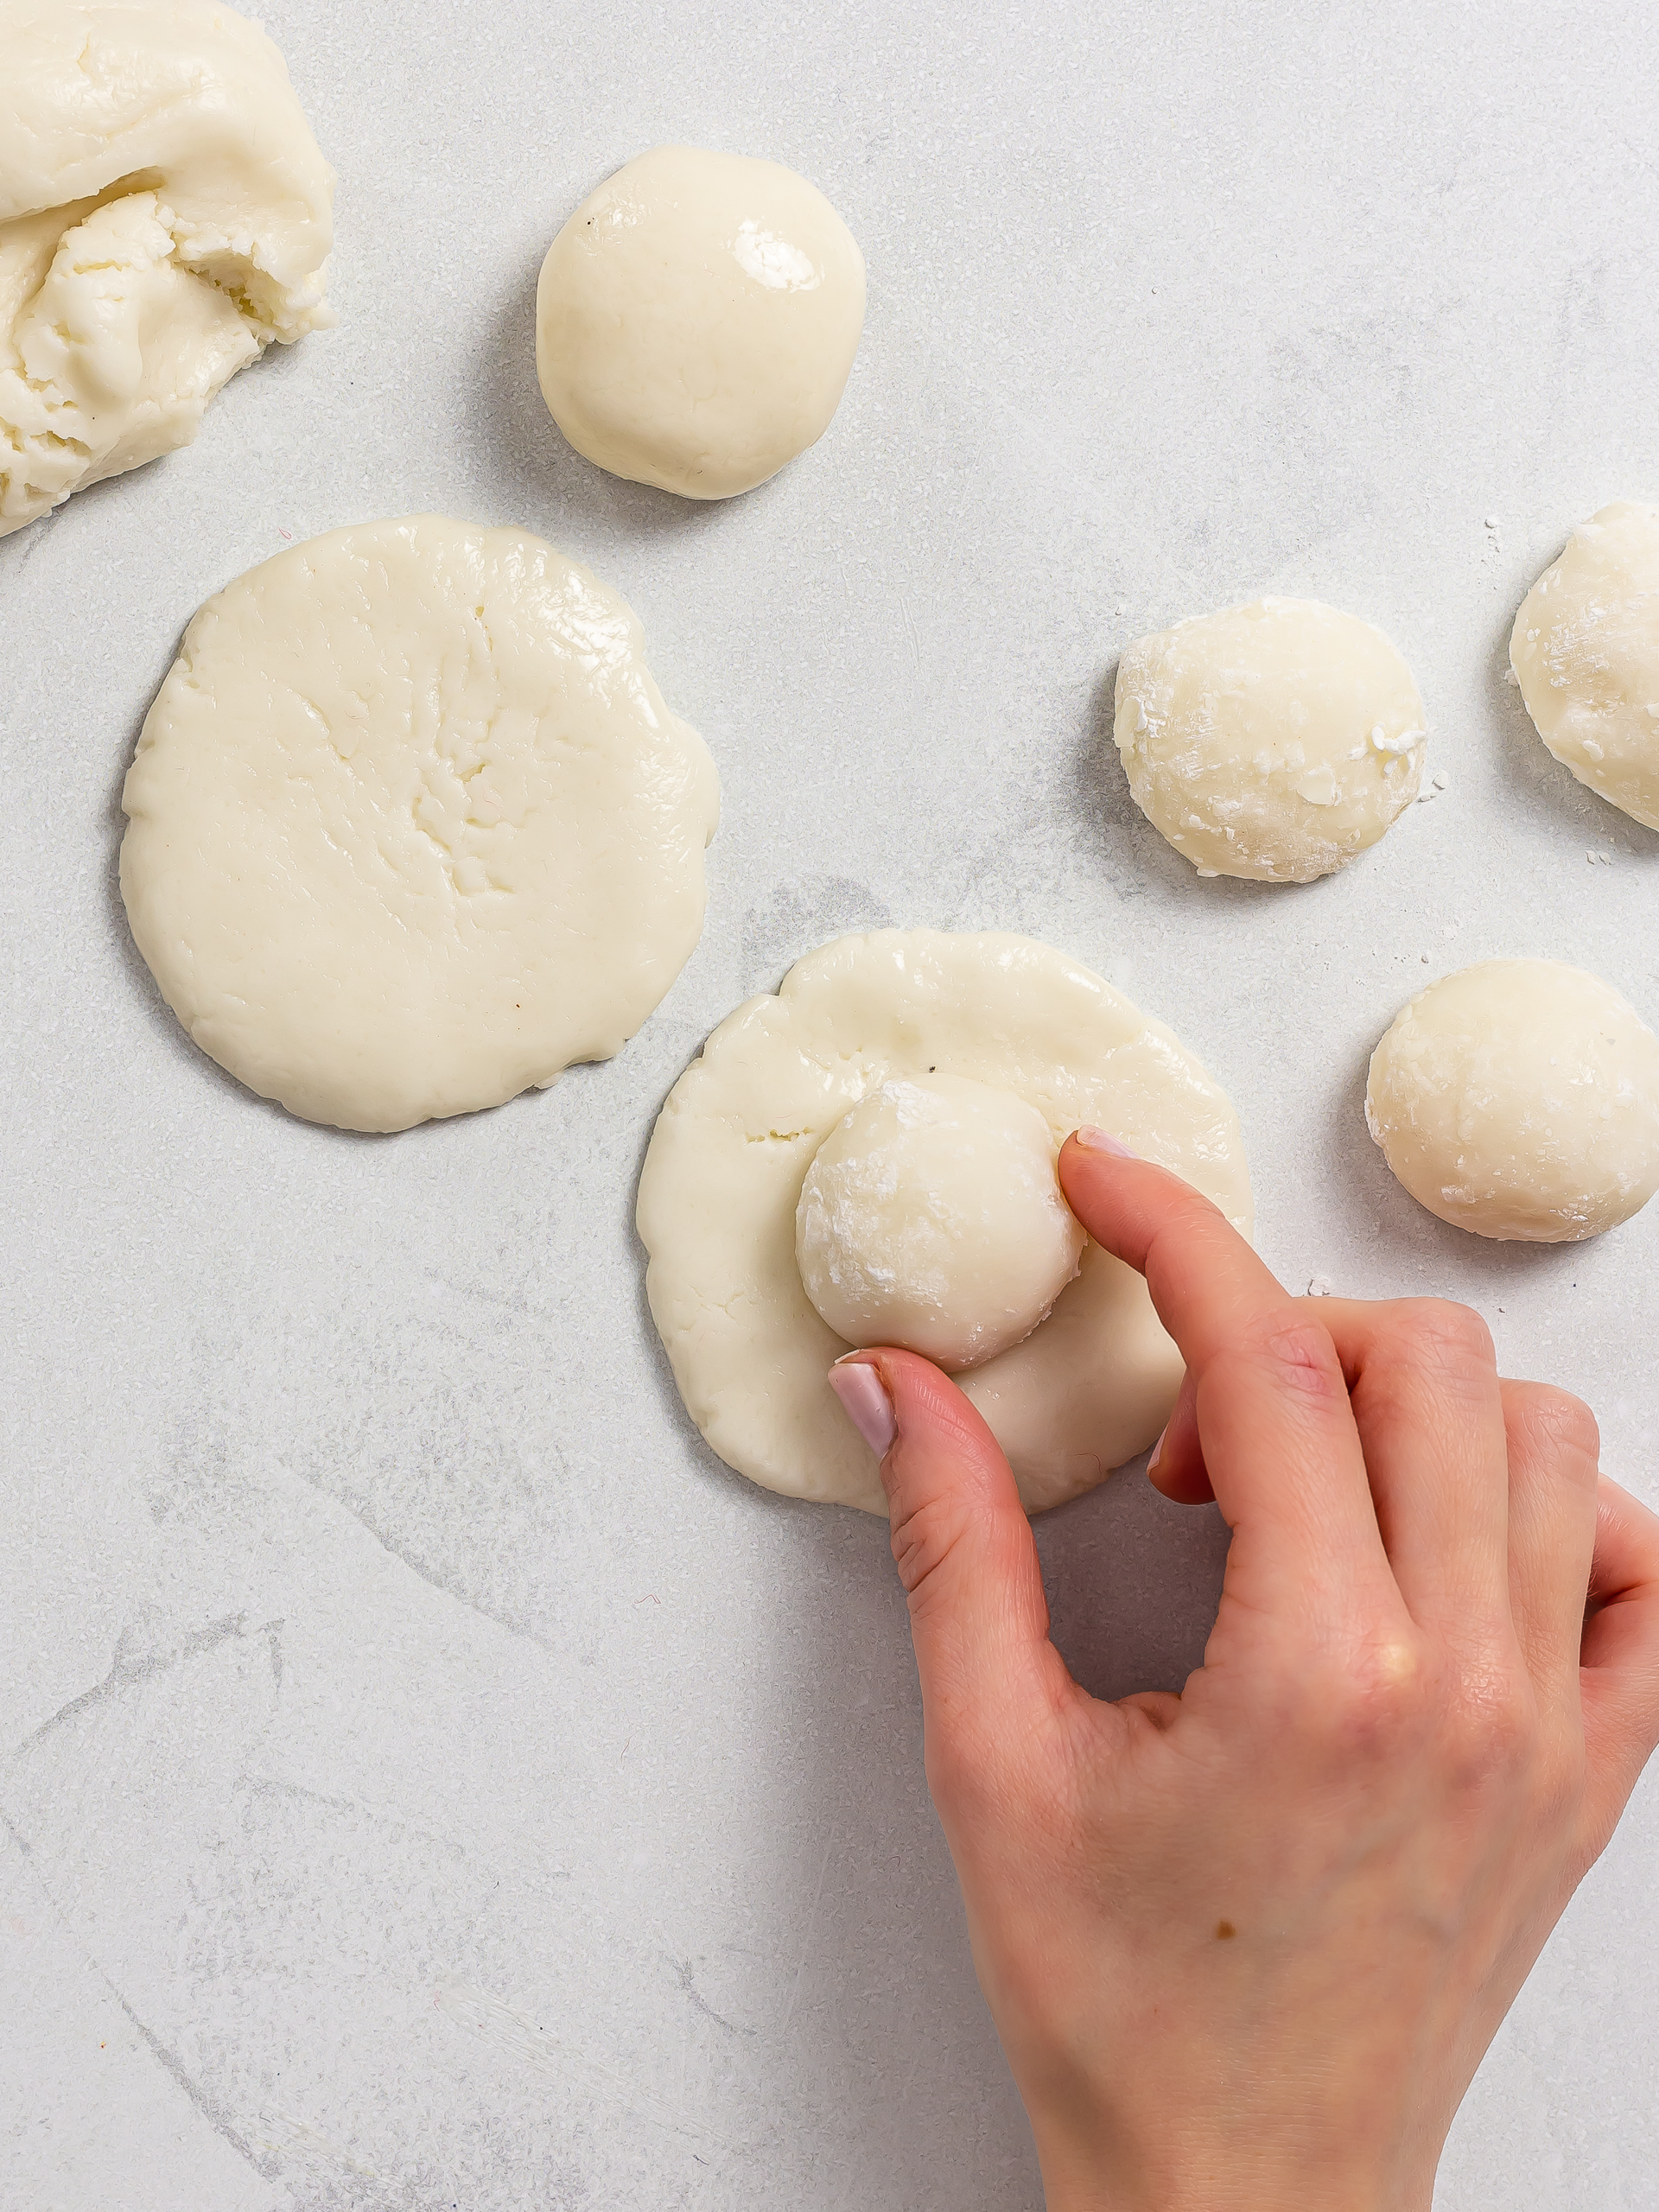
Remove the mochi cookie dough from the fridge and divide it into pieces, about 40 grams (1.4 oz) each.
For each piece, roll it into a ball and then flatten it into a disc.
Make sure the disc is thinner at the edges than at the centre, as the edges will overlap when you fold them over the filling.
Now, dust your hands with a little starch and pinch off a small piece of soft mochi dough, about 20 grams (0.7 oz).
Roll it into a ball and place it in the centre of the cookie disc.
At this point, you can also add some chocolate chips if you like, for a chocolaty filling.
Step 5
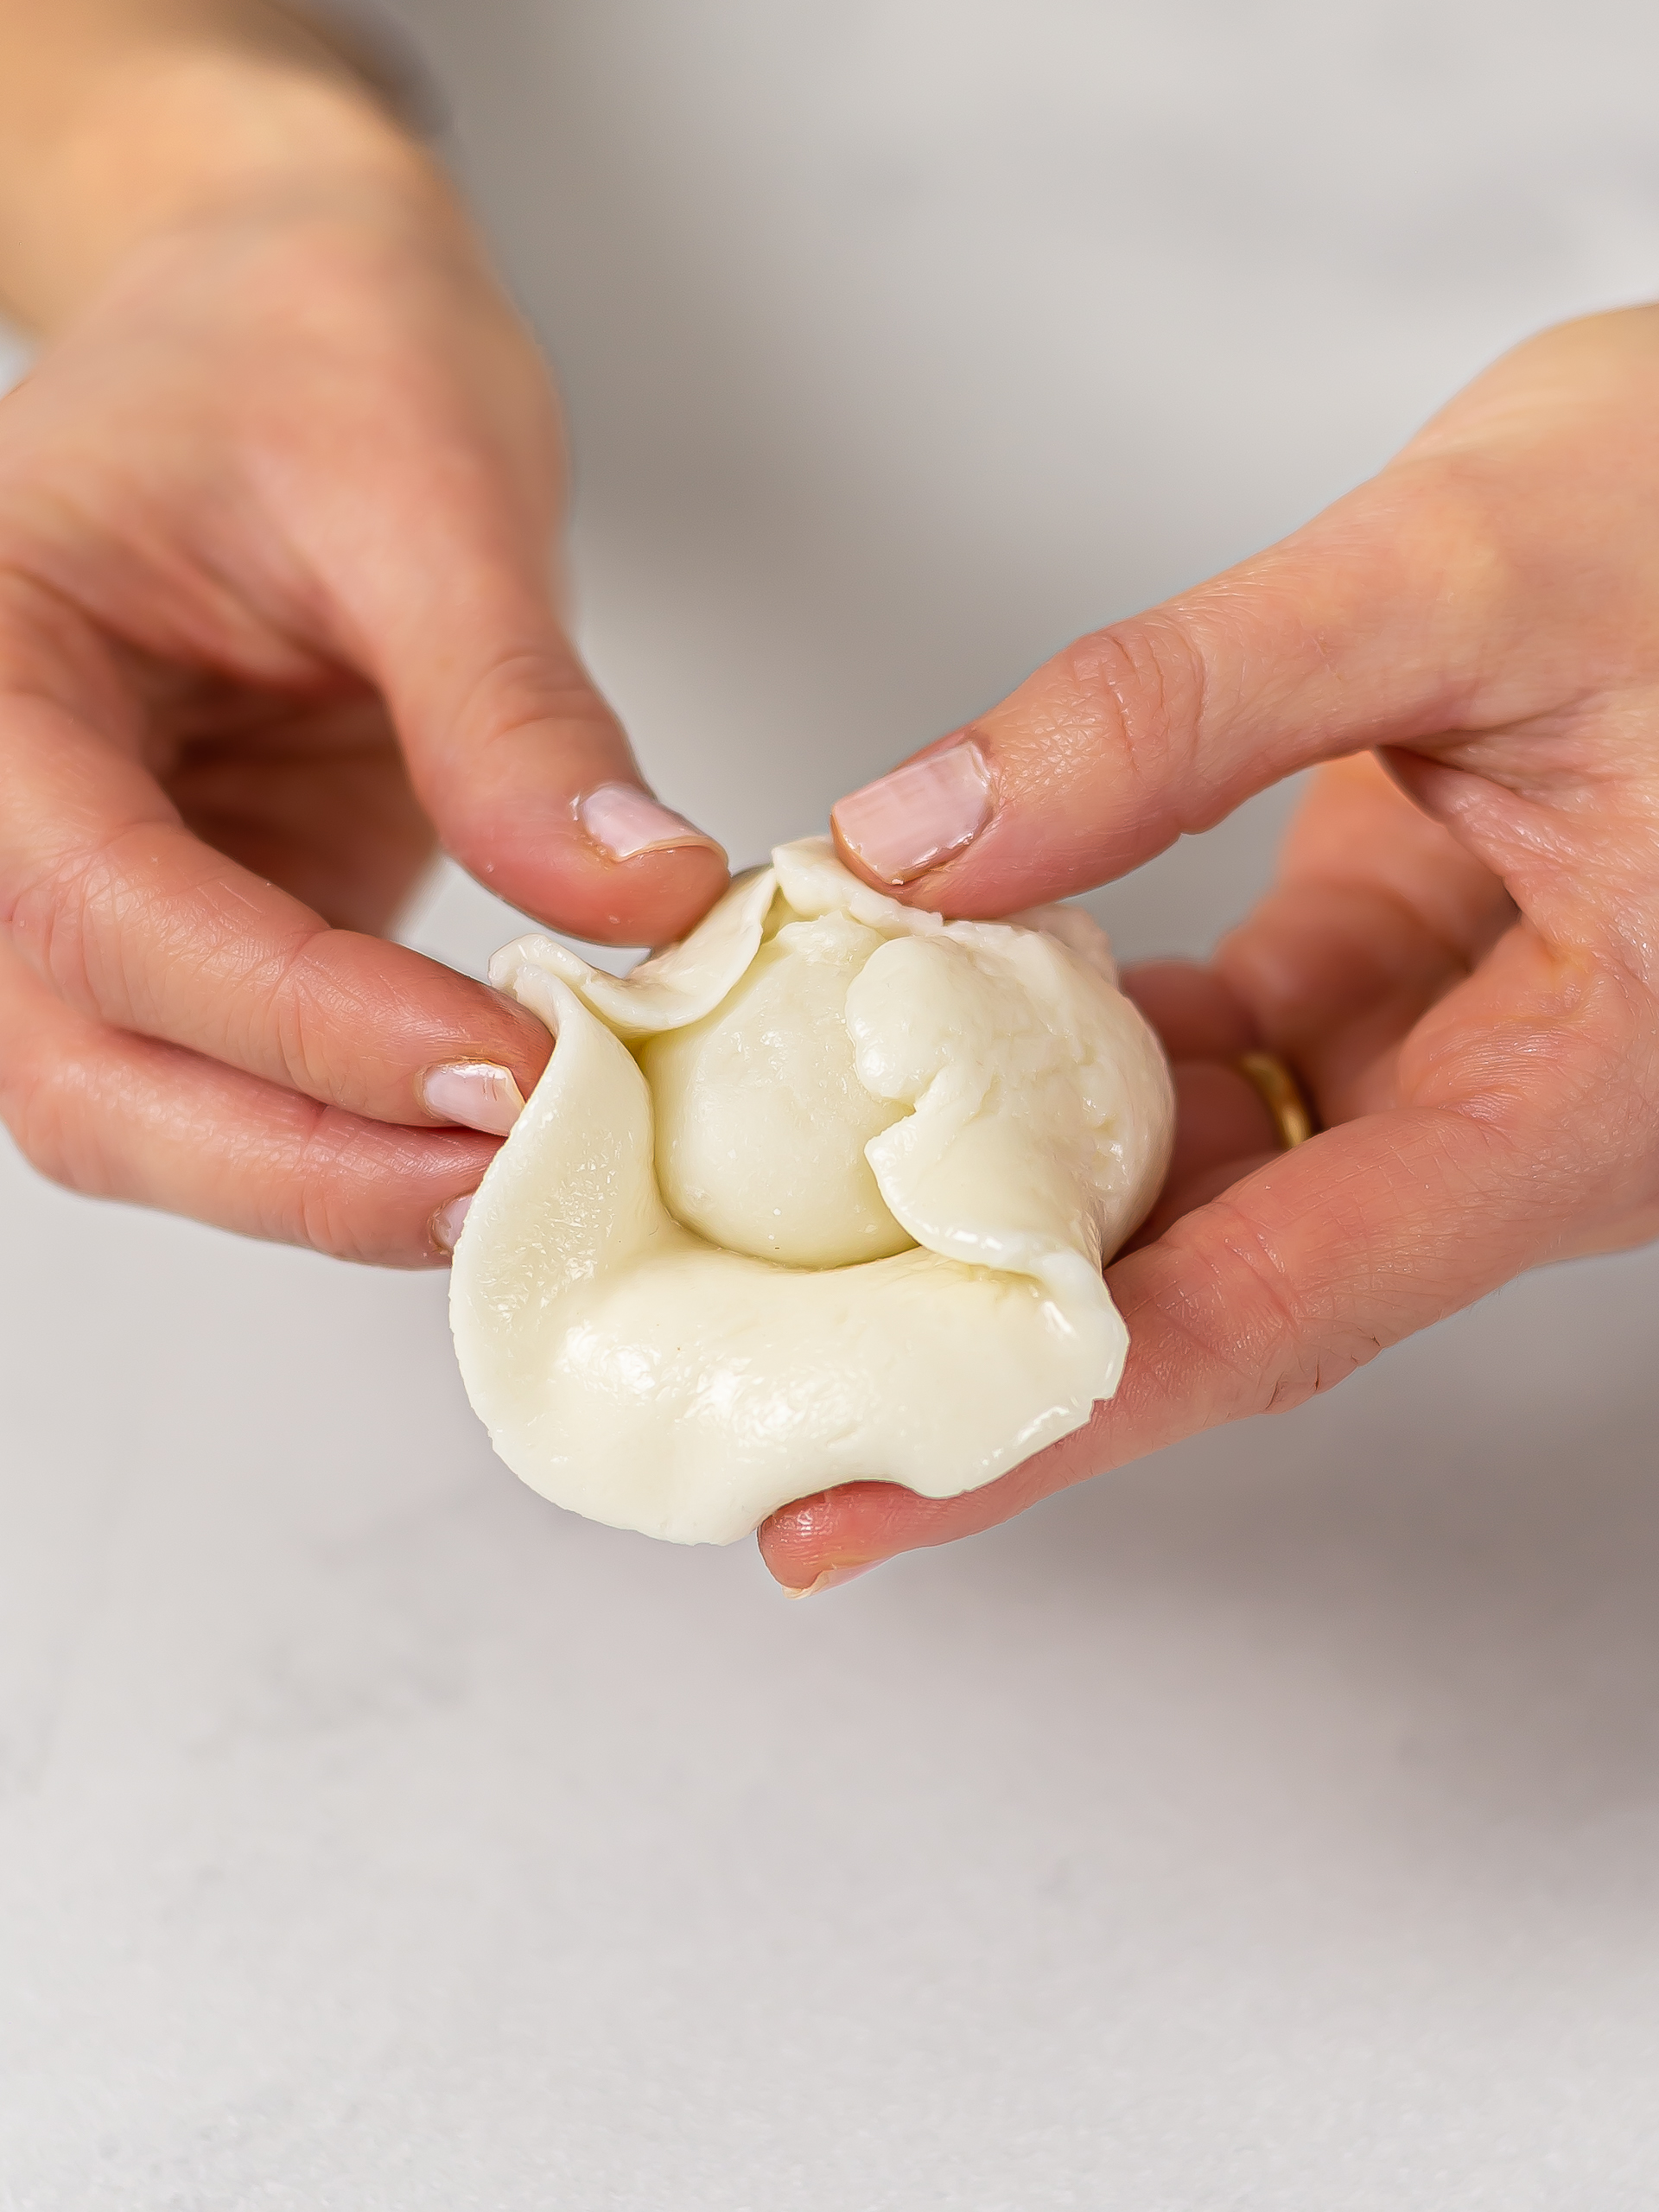
Next, hold the cookie disc in your hand and fold the edges over the mochi filling, sealing them in the centre as you would do for a dumpling.
Don't worry if the cookie dough cracks a bit while you fold it; just pinch it together and smooth it out with your fingertips.
Once sealed, roll the mochi stuffed cookie between your palms until you have a smooth and uniform ball without cracks and creases.
Step 6
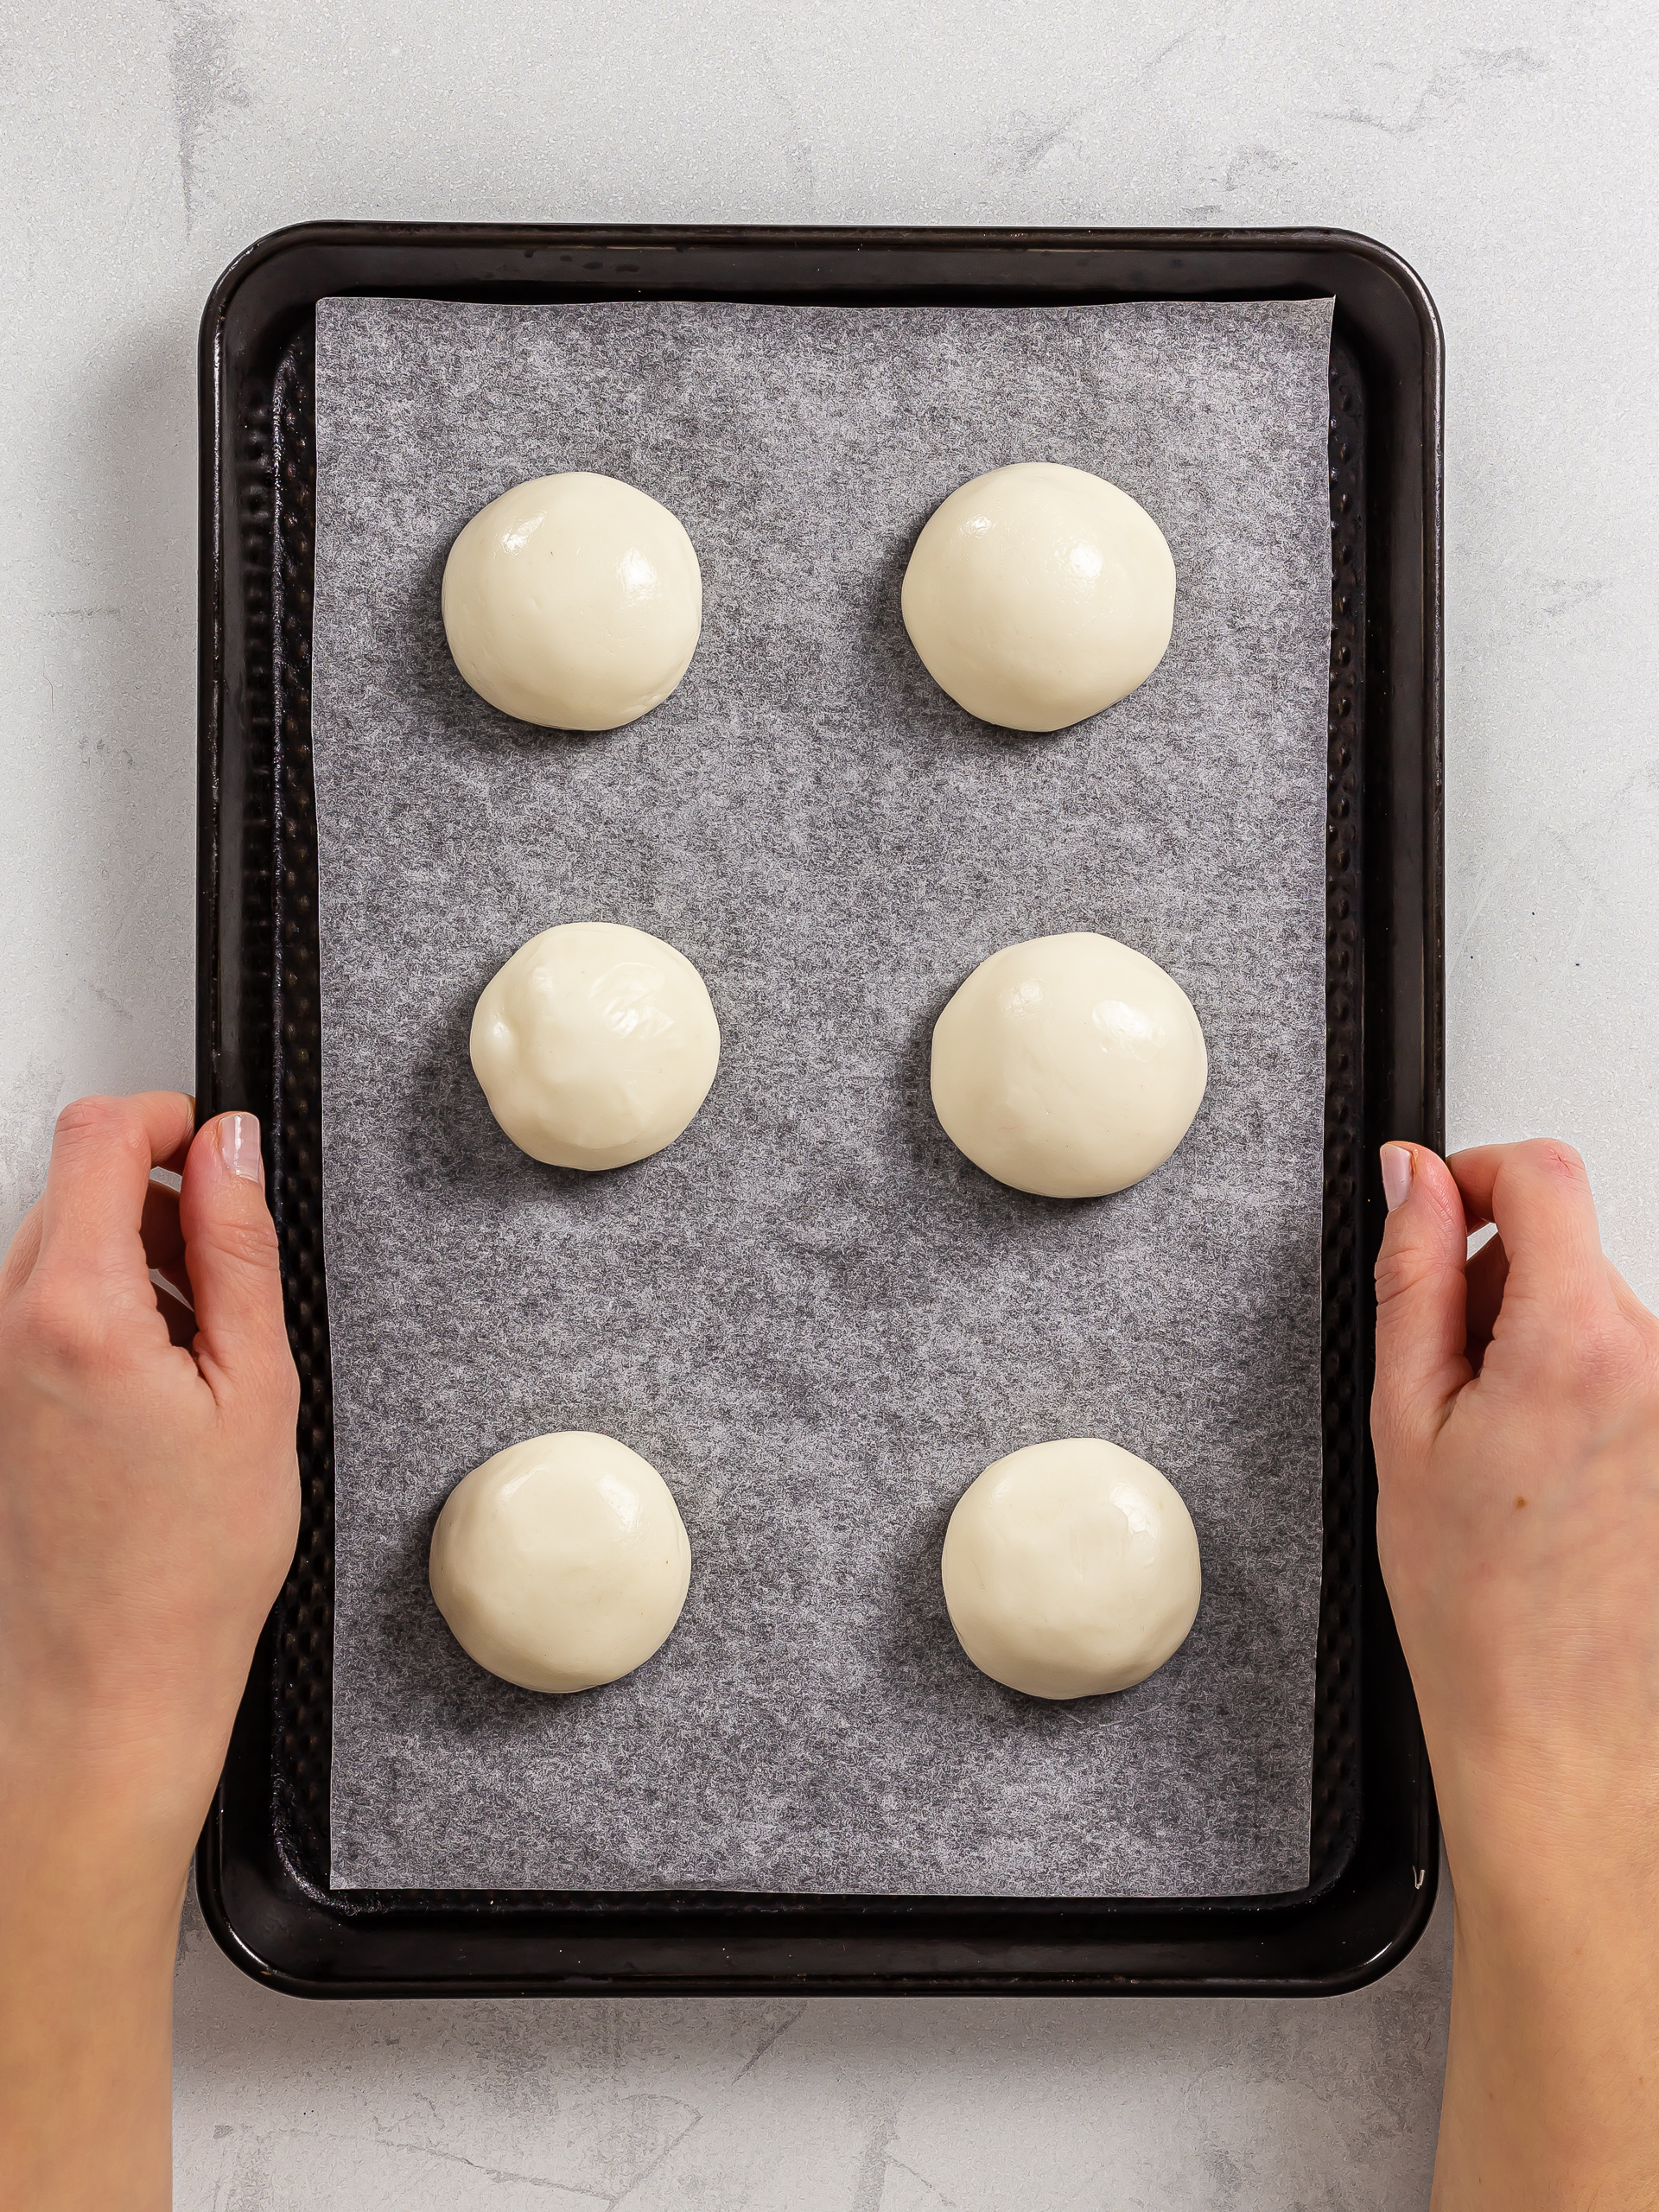
Place the prepared cookie on a tray lined with baking paper, and finish preparing the other cookies until you have used all the cookie dough and filling.
Keep the mochi cookies covered with cling film and let them chill in the fridge for 10-15 minutes while you preheat the oven to 180°C (355°F).
This way, they will hold their shape better when baking.
Step 7
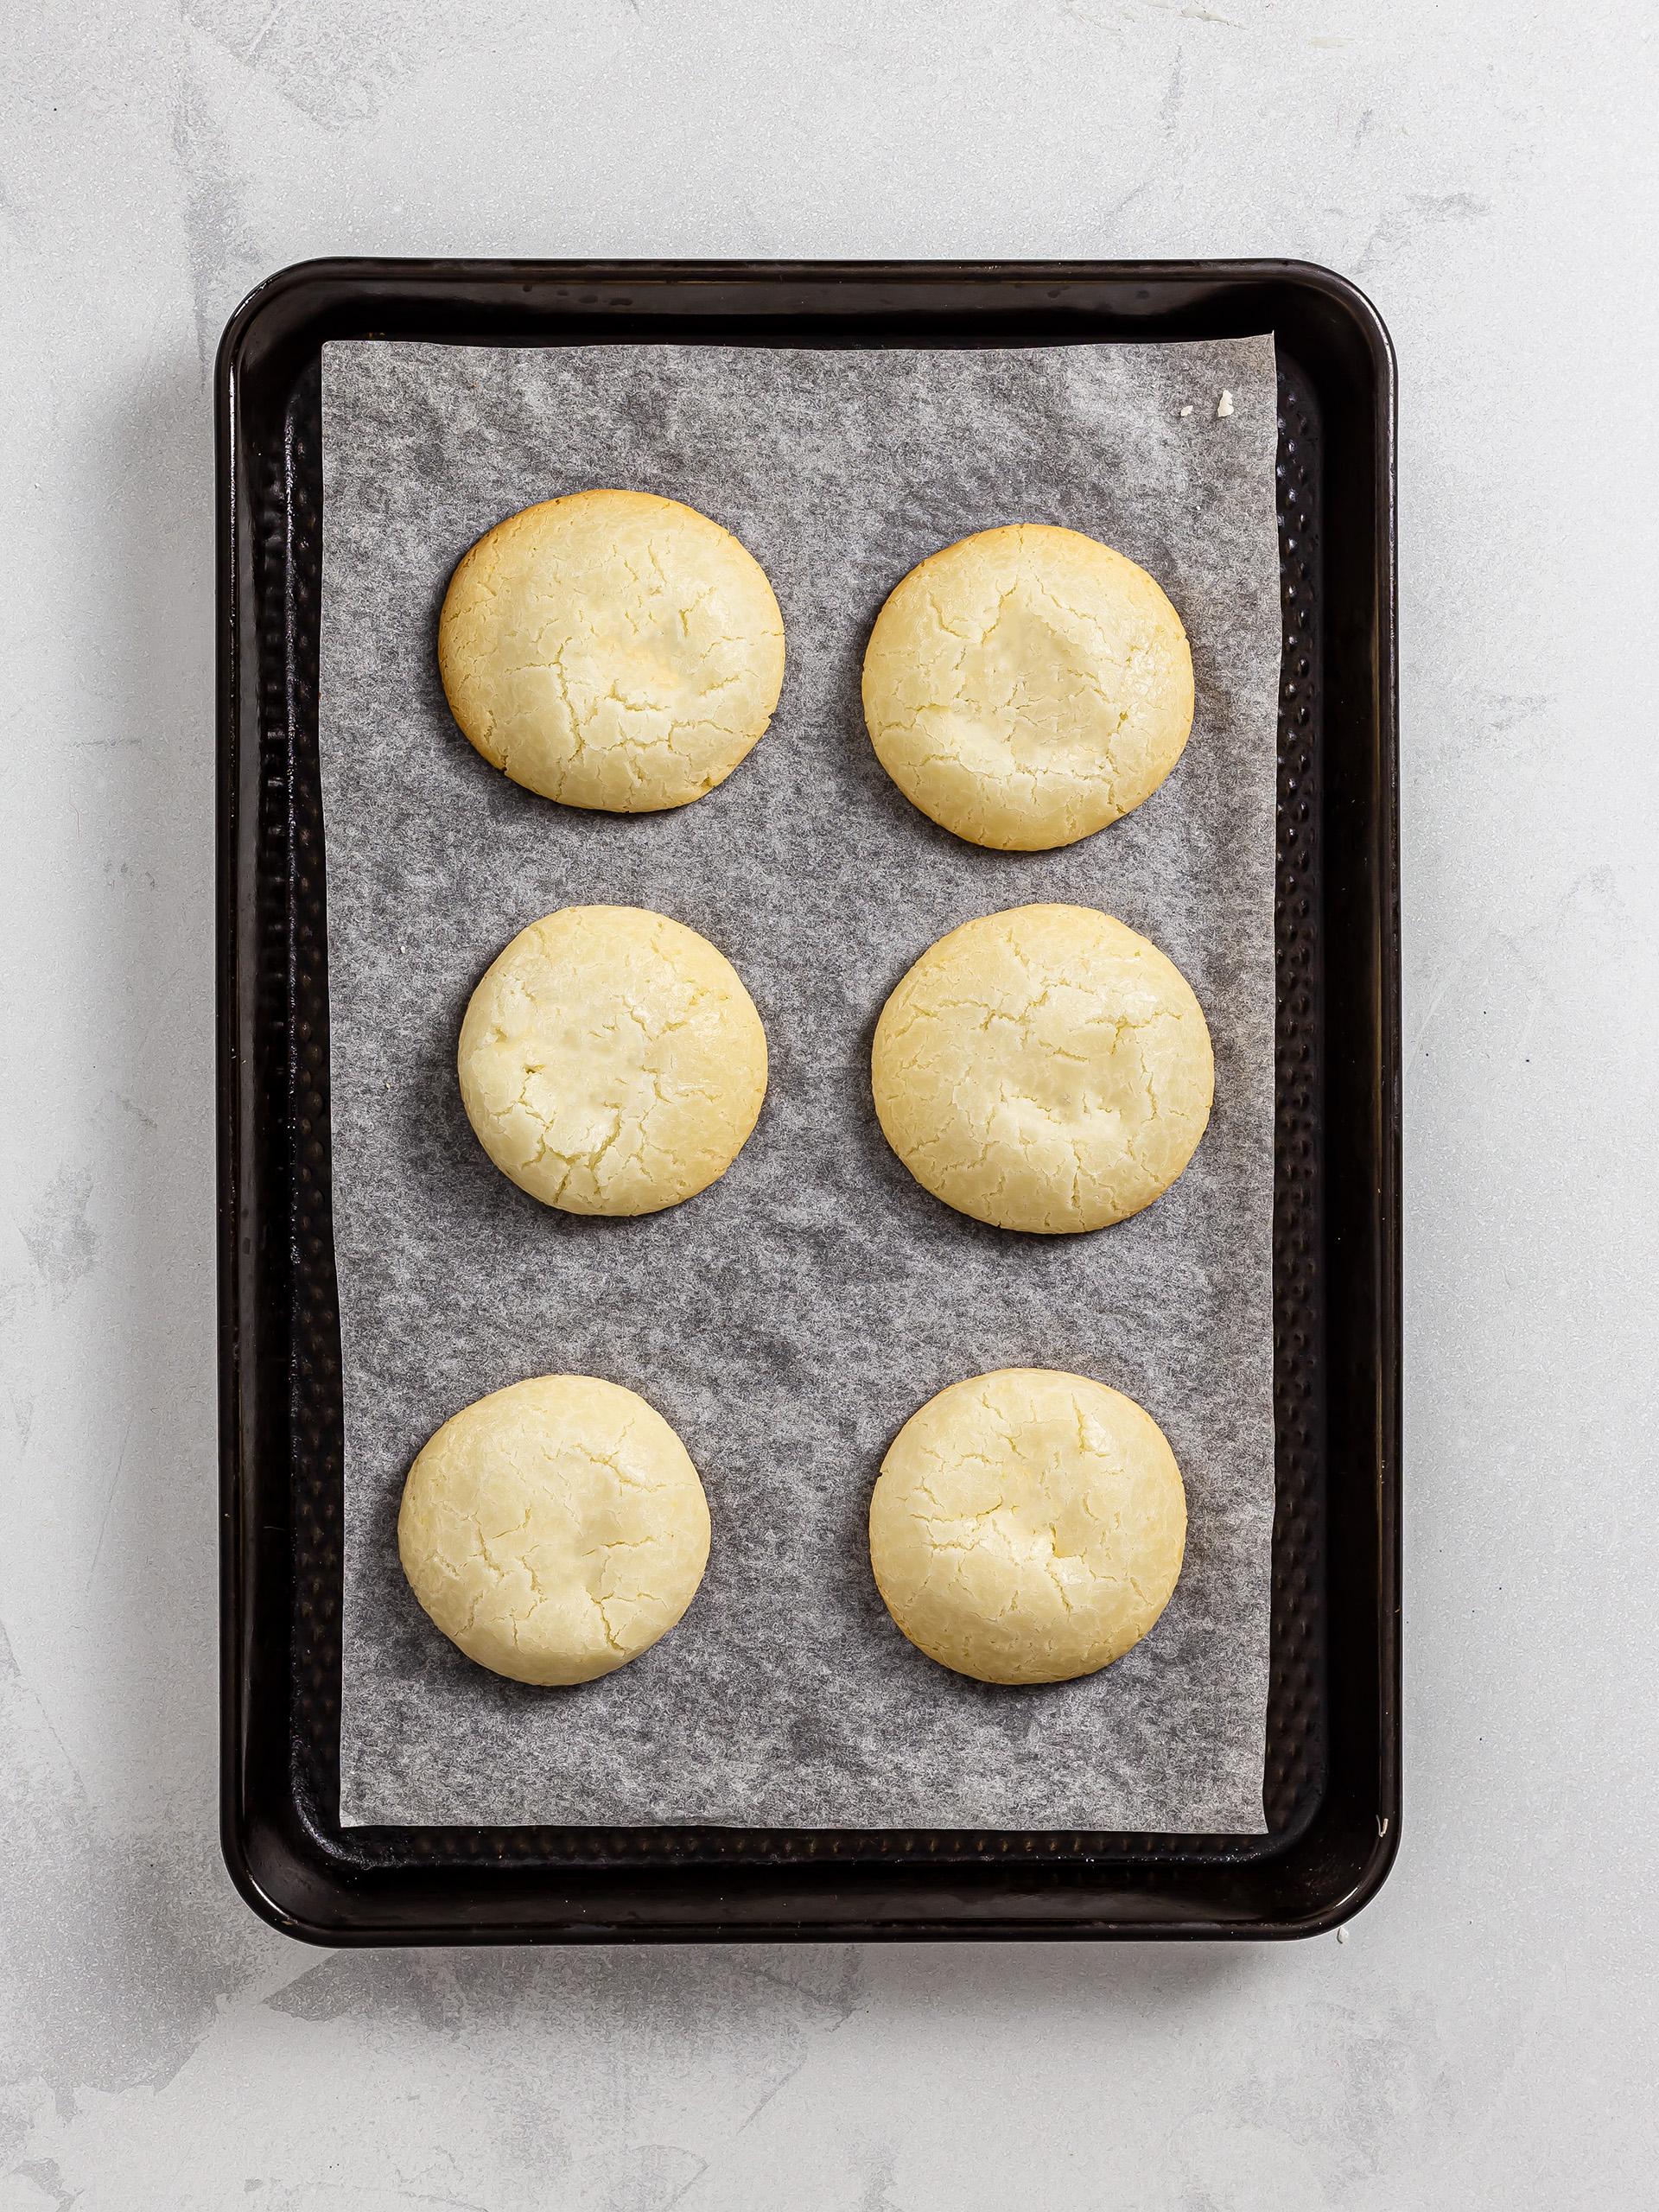
Bake the mochiko cookies for 15 minutes until they're golden, lightly crusty at the bottom but still soft on top.
You'll notice the mochi filling will inflate while the cookies bake, but it will deflate as soon as you remove the tray from the oven (1). It's normal, don't worry.
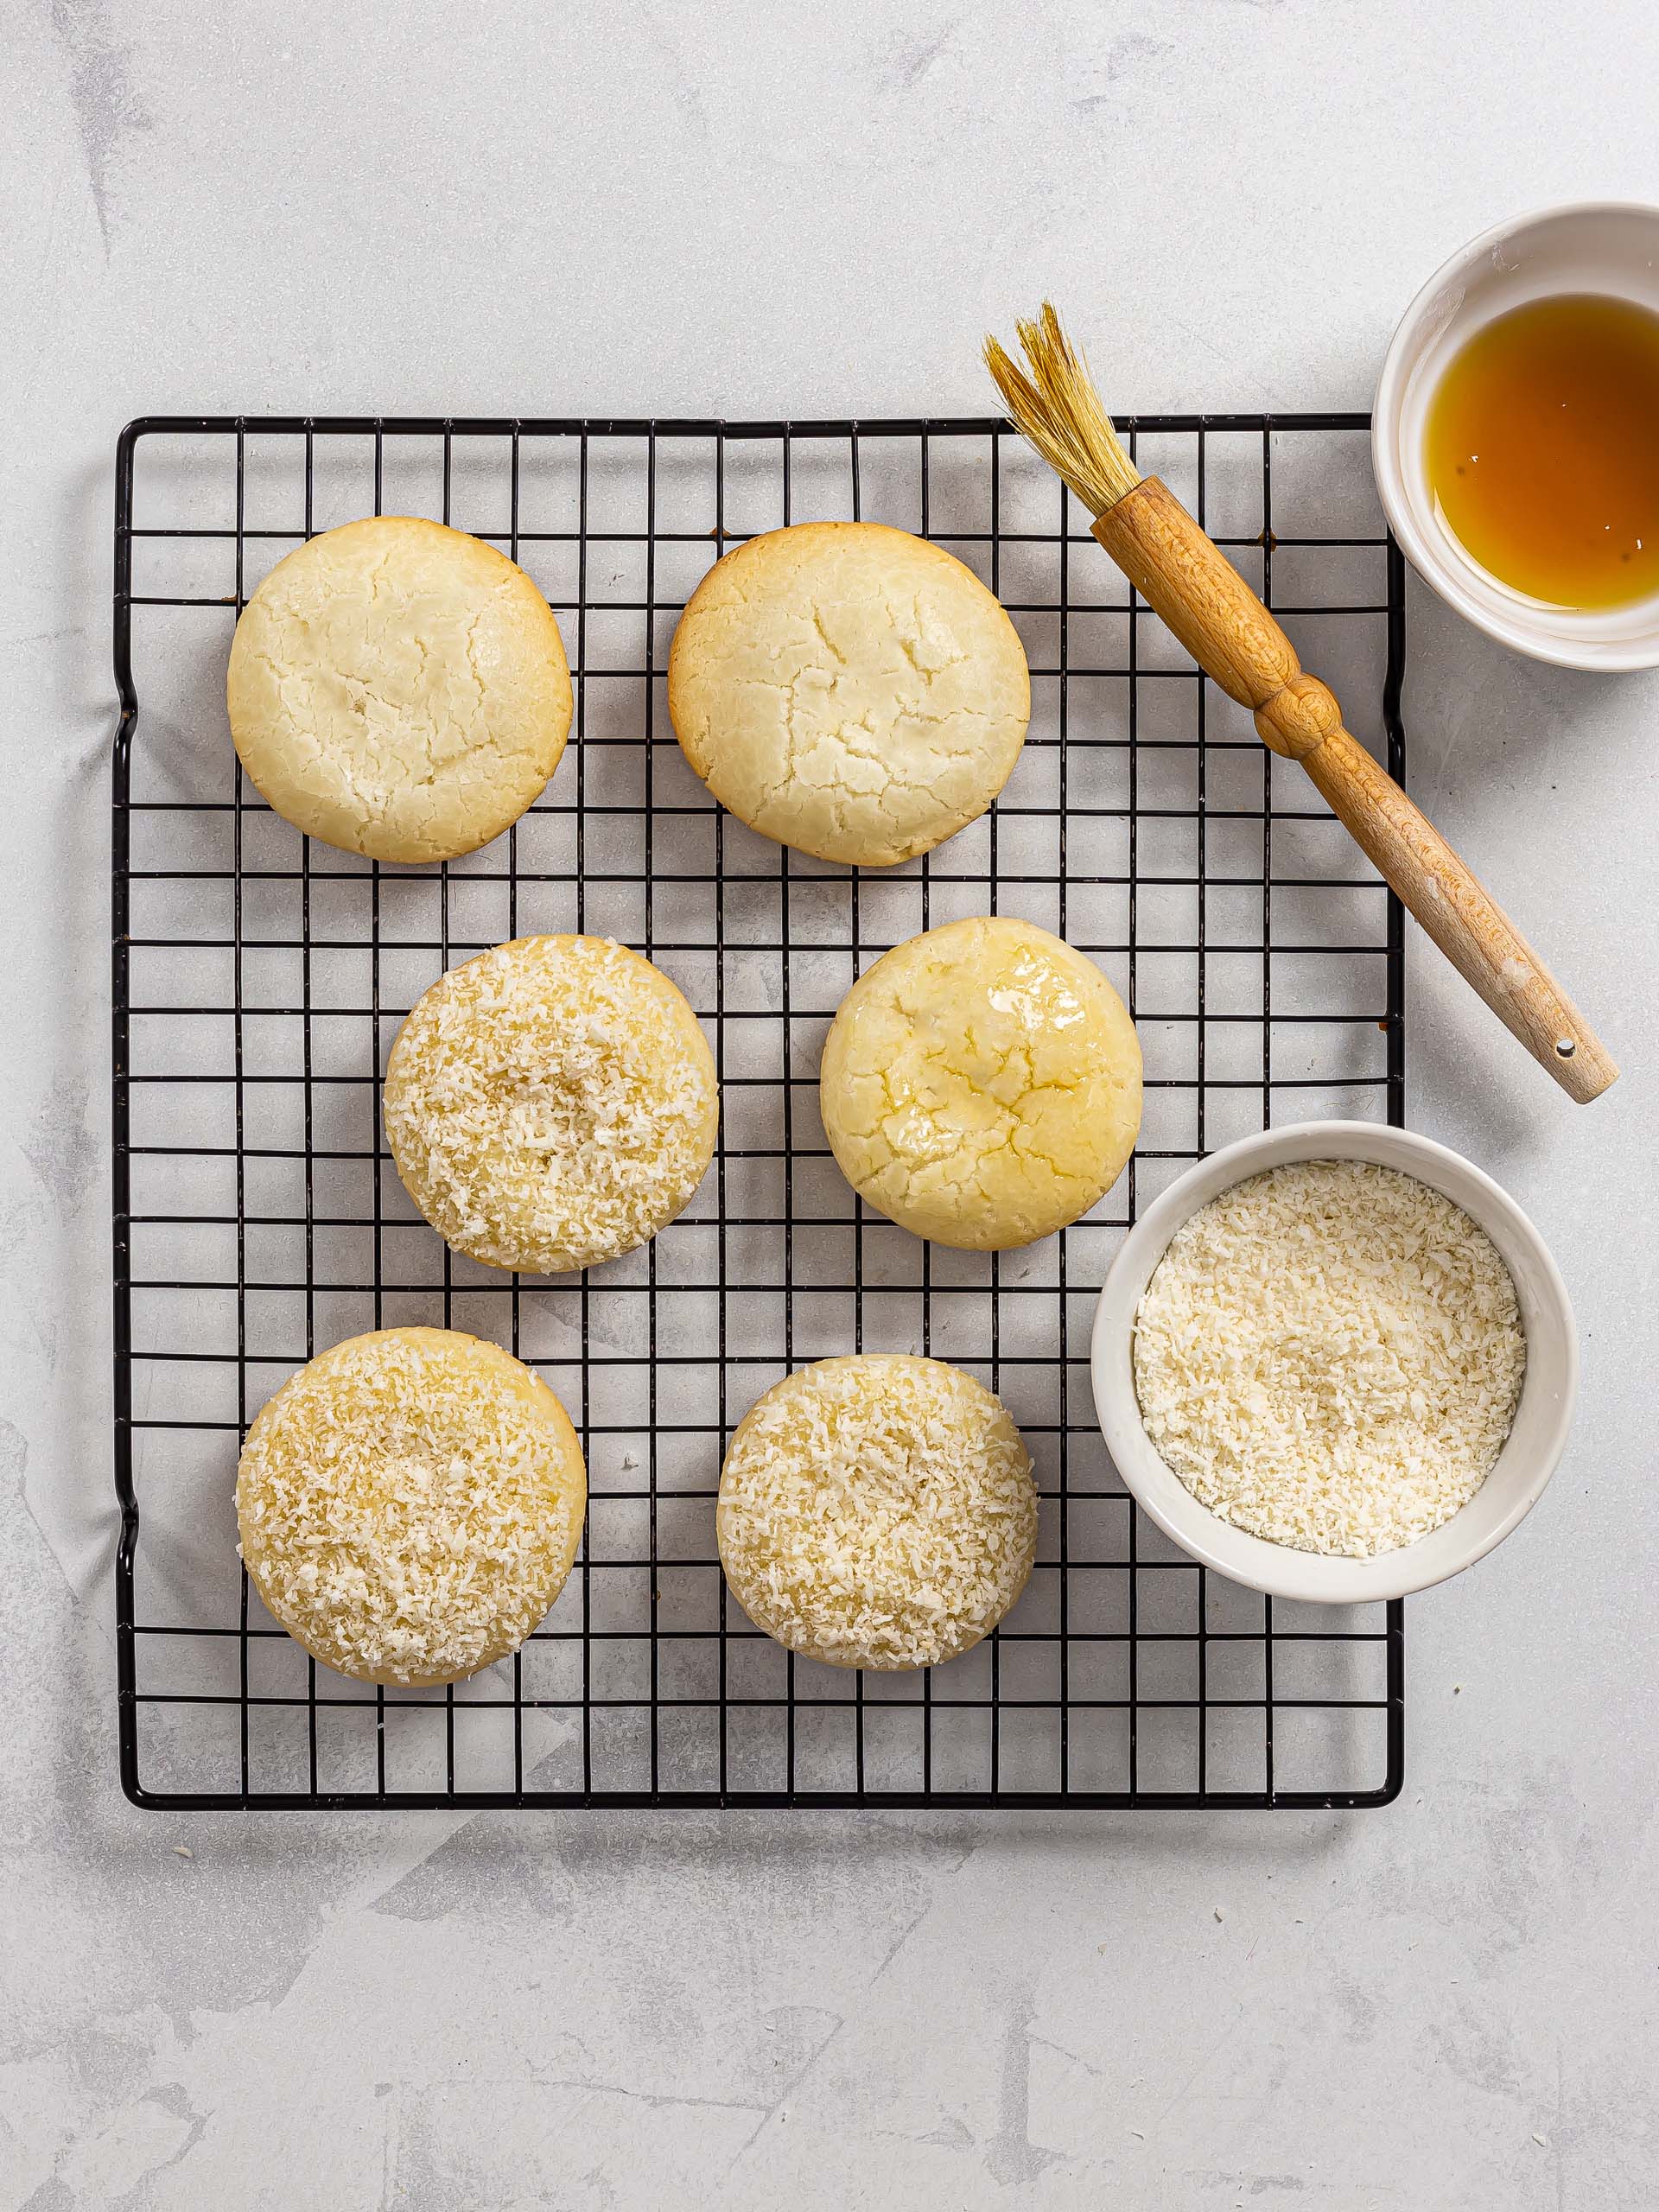
Before serving, you can garnish the mochi cookies with coconut flakes or chopped nuts (2).
To do so, brush the top of the cookies with maple syrup (or honey) and press them into a shallow bowl filled with desiccated coconut or anything else you fancy (like chopped nuts, or chocolate shavings).
Finally, flip the mochi cookies onto a plate and enjoy warm!
Tips
These cookies are at their best when still warm, as the mochi filling will be at its softest and gooiest.
