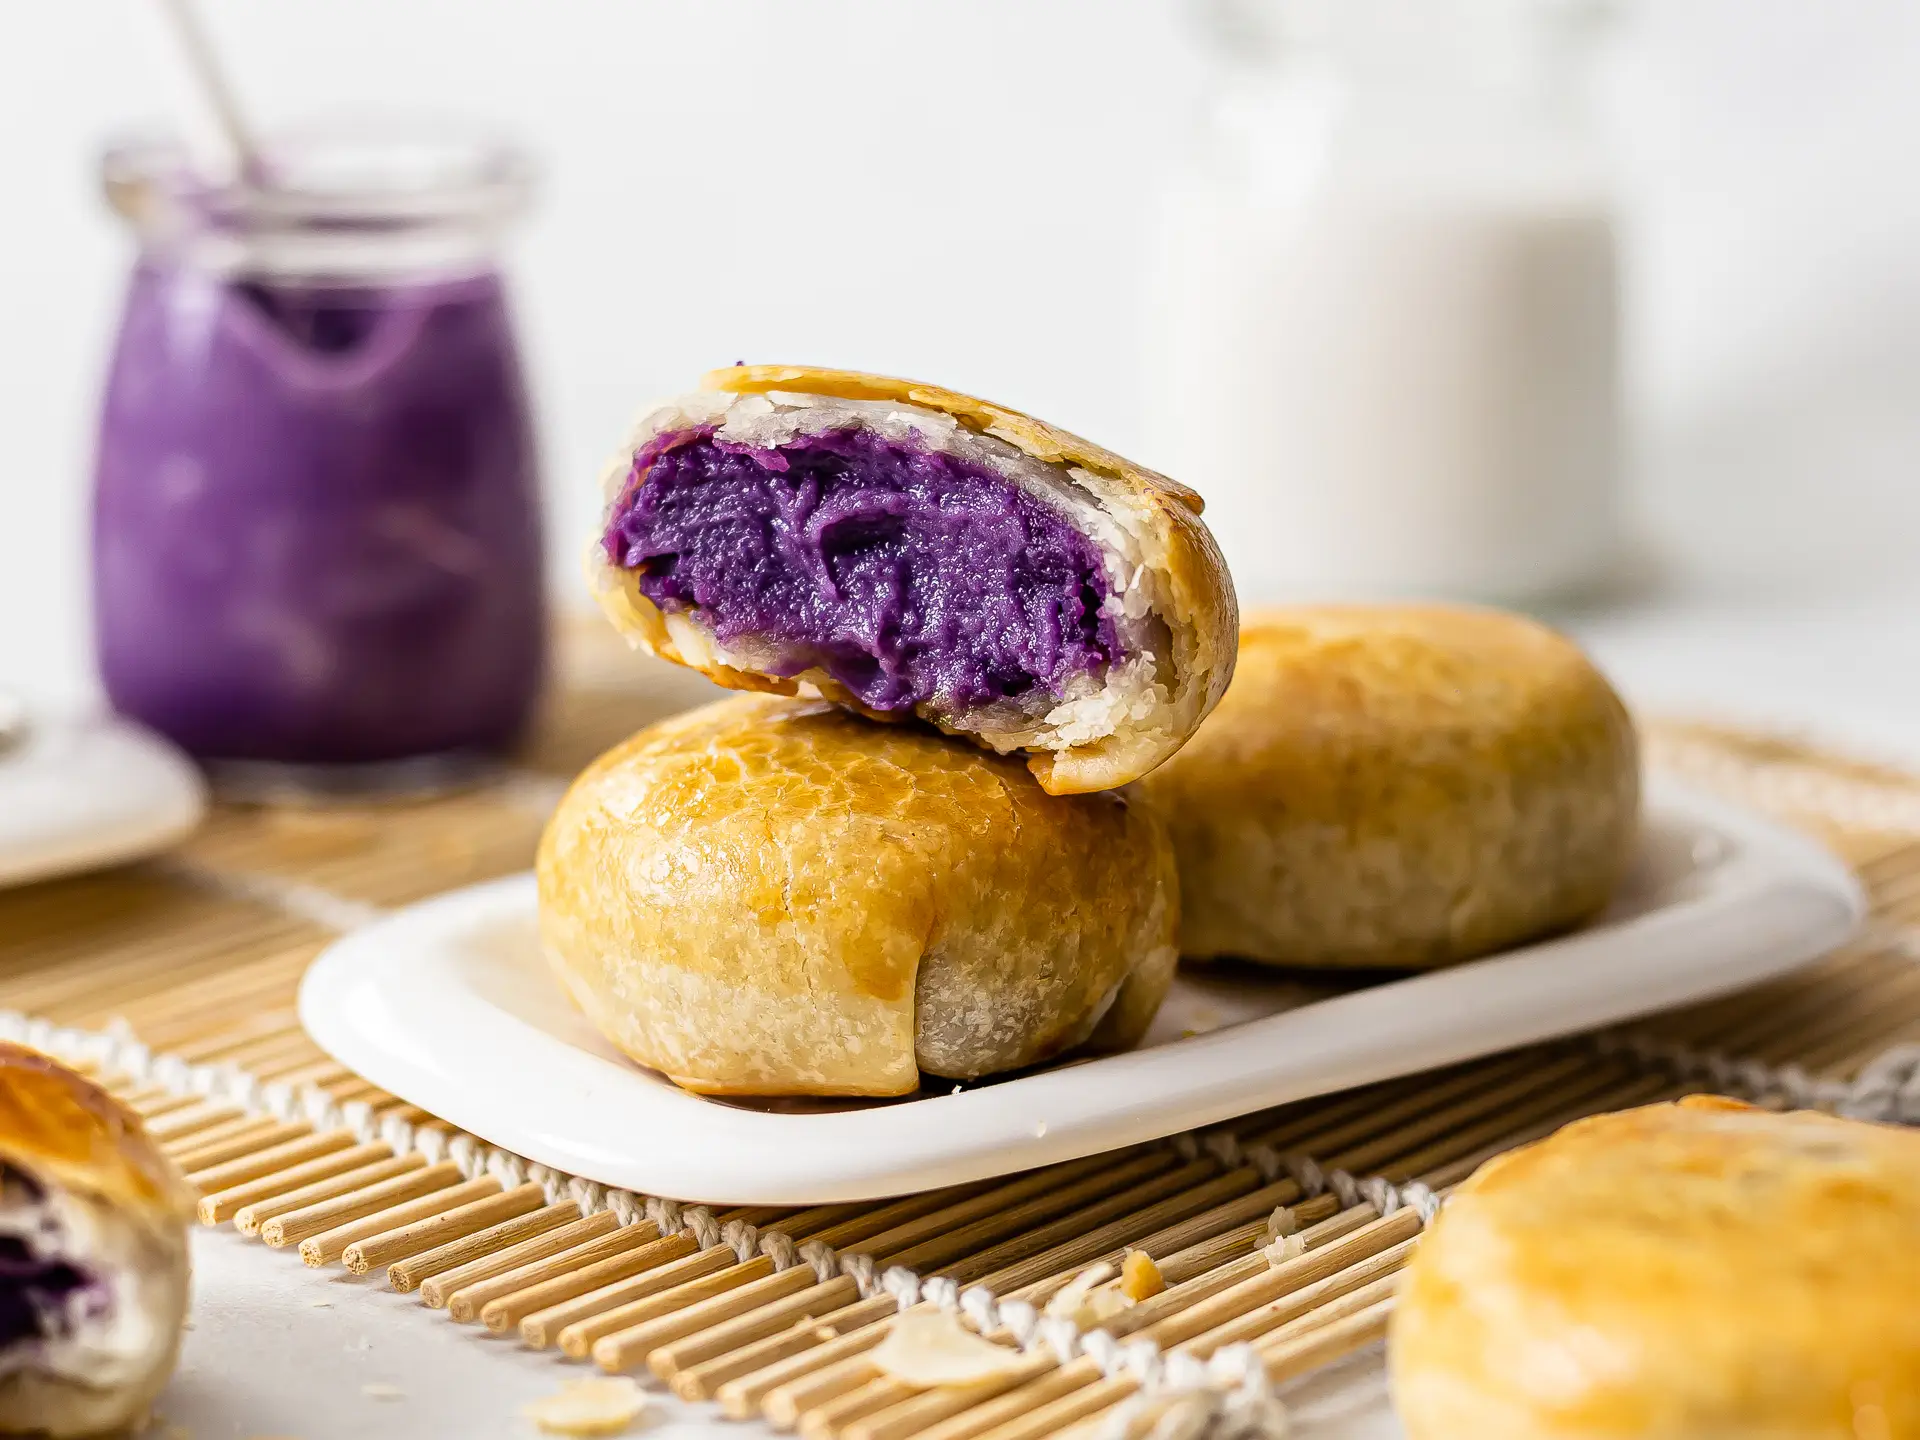
Ube hopias are traditional Filpino pastry cakes with purple yam filling. If you had these sweet morsels before and want to try making them at home from scratch, this easy step-by-step recipe is for you. You can read a bit more about the recipe, or skip straight to the instructions!
Also known as hopiang ube, ube hopia is a variant of hopia that uses ube instead of the traditional sweet mung bean paste filling.
Ube is the Filipino word for purple yam, a tuber with strikingly purple flesh native to the Philippines. This root tastes a bit like a sweet potato but nuttier, with hints of vanilla. Some even say it tastes a bit like white chocolate!
In the Philippines, ube is traditionally used to make ube halaya, a custard-like dessert with mashed purple yams, sugar, and milk.
And ube halaya (also called ube jam) is often added to desserts like flans and puddings or used as filling for cake rolls, doughnuts, and, yes, hopia pastries too!
To make ube hopias, you can use ready-made ube halaya or prepare it yourself from scratch.
You should be able to find ube halaya at your local Asian food store, and if not, it's easy to get it online.
If you want to prepare the ube filling from fresh purple yams instead, you can follow our quick homemade ube butter recipe!
Our ube butter recipe skips the milk and uses less sugar; it also includes a little coconut oil which helps the spread firm up when chilled. The recipe yields one medium jar, enough to fill these pastry cakes. Give it a go if you like!
As for the dough, hopias usually consist of a flaky pastry shell, but some variations come with a cake-like crust.
In our recipe, we used pastry dough, and we'll show you how to make it from scratch using flour, oil, and water.
Because Filipino hopias have Chinese origins, the dough preparation follows the Chinese puff pastry method. First time hearing it?
Chinese puff pastry is made by repeatedly folding and rolling out alternating layers of a "water dough" and "oil dough" to make a flaky and light crust.
The process is similar to the lamination you have in puff pastry for croissants.
But instead of using butter for the fat layer, it uses an "oil dough". This dough is a paste-like mix of flour and oil and resembles melted peanut butter. It's easy to make and dairy-free too, which is a nice plus!
We used the Chinese pastry process before in our no-butter sourdough croissants, which were a success! So, we're happy to use it once more to make these ube hopia cakes.
The dough preparation will take some time as you have to chill the dough between laminations, but it will be totally worth it! You'll have ultra flaky hopia cakes with a divine sweet and creamy ube filling — you'll love them!
And if you've got leftover ube halaya when you're done, you can use it in these ube cinnamon rolls, ube puffed rice bars or this Filipino ube cake roll. They're all great!
Ingredients
| Filling | |
| Ube Spread (ube halaya)recipe | 300 g |
| Oil Dough | |
| Plain All-Purpose Flour | 120 g |
| Salt | 1/4 tsp |
| Vegetable Oil | 80 mL |
| Water Dough | |
| Plain All-Purpose Flour | 180 g |
| Salt | 1/4 tsp |
| Caster Sugar (or erythritol sweetener) | 1 tbsp |
| Vegetable Oil | 60 mL |
| Cold Water | 80 mL |
Step 1
For the hopia filling, you can use ready-made ube spread or prepare it from scratch.
Also called ube halaya (ube jam), ube spread is a creamy paste made with mashed purple yams.
You can find it online or at your local Asian food store.
If you can get hold of purple yams (fresh or frozen), you can make ube halaya yourself following our easy ube butter recipe.
And if you can't find purple yams, you can replace them with purple-fleshed sweet potatoes, which are very similar in taste and texture, just a little sweeter.
Portion the ube spread into 25g (0.9 oz) mounds or balls and keep them in the fridge while you prepare the hopia dough.

Step 2
For the hopia pastry, you'll prepare a "water dough" and an "oil dough" and then laminate them together to make a flaky pastry dough.
For the "water dough", mix sifted flour with salt and sugar (or erythritol sweetener) in a bowl.
Then, tip the oil and rub it into the flour with your fingertips until you have a crumbly dough (1).
Now, pour in the cold water and work all into a smooth and pliable dough, kneading it for a few minutes on your worktop (2).
Wrap the dough in cling film and let it chill in the fridge for 15 minutes.


Step 3
For the "oil dough", mix flour with salt in a bowl and add the oil.
Stir well until you have a silky and slightly runny paste that looks like smooth peanut butter.
Cover the bowl with cling film and let the oil dough harden in the freezer for 5-10 minutes.

Step 4
For the first lamination, you want the "water dough" and "oil dough" to be as cold as possible, so they won't mix but rather stay as two separate layers.
Dust your worktop with a little flour.
Use a rolling pin to roll the "water dough" into a rectangle, about 5mm thick.
With the short side of the rectangle toward you, use a spatula to spread the "oil dough" over the bottom half of the dough, leaving a little space on the edges (1).
Then, fold the top half of the rectangle over the oil dough layer to cover it (2).
Seal the dough edges, pressing with your fingertips; this way, the oil dough won't ooze out when you roll out the dough in the next step.


Step 5
Now, turn the folded dough by 90°, so the short side of the rectangle is toward you.
Use a rolling pin to roll the dough into a long rectangle about 3 mm thick.
Keep the short side of the rectangle toward you.
Fold the bottom 1/4 of the rectangle (1) and then the top 3/4 so that the dough ends meet (2).
Finally, dust off any flour with a pastry brush, and fold the dough onto itself, as you would do to close a book (3).


Step 6
Next, chill the dough.
Wrap the dough with cling film, place it on a tray or plate, and let it chill in the coldest part of your fridge for 30-40 minutes.
This step is important to let the oil and dough layers harden.
This way, they won't mix when you repeat the lamination process.

Step 7
Now, you'll have to repeat the lamination 2 more times.
Each time, take the dough out of the fridge, unwrap it, and place it on a lightly dusted worktop with the short side of the rectangle toward you.
Use a rolling pin to roll the dough into a long rectangle about 5 mm thick (1).
Fold the bottom third of the dough rectangle toward the centre and brush off any excess flour (2).
Then, fold the top 1/3 over the centre as you would do to close an envelope, and brush off any flour (3). Note that now you are folding "thirds", while during the first folding you did "fourths".
Finally, lightly roll the dough to make it flat and even, wrap it in cling film and put it back into the fridge for 30-40 minutes.


Step 8
Next, you'll roll the dough to increase the lamination layers.
This is a quick way to get lots of layers without repeating the lamination too many times.
To do it, unwrap the dough and roll it out into a large rectangle, as thin as possible.
If the dough feels too stiff and recoils back, let it rest for a few minutes.
Start at the short end of the rectangle and roll the dough tightly into a log (1).
Then, press the log down with the rolling pin to flatten it (2) and roll the dough back into a rectangle.


Step 9
Now, make the hopia dough wrappers.
Use a sharp knife or a pastry wheel cutter to cut thick squares of dough — as many as the number of servings (12 for the default ingredients).
Why squares and not circles, you ask? So that you don't have any leftovers to re-process!
Work with one square at a time, and keep the others in the fridge wrapped in cling film so they won't get too warm and oily.
Flatten each dough square into an 8-8.5 cm (3-3.5 inches) hopia wrapper, keeping the edges thinner than the centre, as shown in the picture.

Step 10
Next, fill and seal the hopia cakes.
Place one ball/mound of the ube spread you portioned in the first step and place it in the centre of the pastry dough wrapper (1).
Fold two opposite sides of the dough wrapper over the ube filling, then the other two sides, and finally fold any dough creases toward the centre.
Press and pinch the dough at the top to seal the hopia as you would do to close a dumpling (2).


Step 11
To shape the ube hopia like a dome, slot the hopia seam-side-up into a small measuring cup lined with cling film.
We used a 1/4 of a cup measuring cup, but you can also use a small cookie cutter or anything that's small and round.
Firmly press the hopia down into the cup to mould it, and also to seal and secure the seam (1).
Then, pull the cling film to pop the hopia cake out of the cup and flip it (2).
Ensure the hopia is well sealed and the dough has no holes, or the ube spread will leak while the pastries bake.
Repeat steps 9 to 11 until you have used all the hopia pastry dough and ube filling.


Step 12
Next, bake the ube-filled hopia cakes.
Preheat the oven to 190°C (375°F) and line a baking tray with parchment paper.
Place the hopia cakes onto the prepared tray, seam side up (1).
Bake them for 12-15 minutes.
Then, take the tray out of the oven and carefully flip the hopia, so the seam faces down.
Gently press the top of the pastries with a spatula to flatten them.
At this point, you can optionally brush the hopia for a golden finish.
You can use the classic eggwash or opt for oil or a mix of maple syrup and soy milk for a vegan alternative.
Return the hopia cakes to the oven and bake them for 12-15 minutes or until they're golden and crusty.
Let them cool down on a wire rack before serving (2).


Step 13
Your homemade ube hopia pastries are ready!
Serve them warm or cold, and enjoy them with a hot cup of ginger herbal tea, an iced ube bubble tea, or a tropical pineapple smoothie.
And if you liked this recipe, why not try hopias filled with sweet mung bean paste next? Give them a go!

Tips
Here are some freezing options:
Freezing the hopia dough
You can freeze the pastry dough wrappers you made in step 9.
Wrap them individually with cling film or baking paper and keep them in a freezer-friendly bag or container for up to 3 months.
To use, let them thaw completely until pliable again, and proceed to fill and shape.
Freezing the uncooked hopia cakes
If you want to make a big batch of hopia pastries and not bake them all in one go, wrap the shaped hopia balls with cling film or baking paper and keep them in a freezer-friendly bag or container for up to 3 months.
You can bake the hopia balls from frozen or let the ube pastries thaw before baking.
Freezing the baked hopia cakes
If you have leftover ube hopia, you can freeze them wrapped in cling film or baking paper. They will keep for 3-4 months.
When you want to eat the hopia cakes, let the dough or pastries thaw completely first.
You can also reheat the thawed hopia in the oven to bring back their crispiness.